
In summary:
- True independence comes not from single gadgets, but from understanding the ergonomic principles that make them work.
- Focus on tools that shift strain from weak joints (wrists, fingers) to larger muscle groups (arms, shoulders).
- Combine physical tools (like weighted cutlery) with environmental adjustments (like non-slip mats) to create a complete support system.
- The goal is to restore specific, meaningful activities—like cooking a favorite meal or dressing for an event without help.
The frustration is familiar for anyone with stiff, painful hands. A tightly sealed jar becomes a fortress. A simple shirt button feels like an impossible puzzle. Cooking, once a joy, devolves into a series of painful challenges. Many articles suggest generic solutions like “use an electric can opener” or “buy pre-chopped vegetables.” While practical, these suggestions often miss the deeper point: the goal isn’t just to get a task done, but to reclaim the dignity and satisfaction that comes with doing it yourself.
The real challenge isn’t just a loss of grip strength; it’s an erosion of independence in the activities that define our daily lives. The conversation around assistive devices often focuses on the “what”—the gadgets themselves. But what if the key wasn’t the tool, but the technique? What if the secret to restoring independence lies in understanding the simple, powerful ergonomic principles behind these tools and integrating them into a personal, holistic system for living?
This guide moves beyond a simple list of products. We will explore the “why” behind the design of these critical tools. We will analyze how a rocker knife leverages arm strength, how weighted cutlery can tame a tremor, and how a few smart, low-cost changes to your living space can create a powerful ecosystem of safety and independence. This is about transforming your relationship with daily tasks from one of struggle to one of confident control.
This article will provide a practical, review-focused breakdown of the most effective adaptive tools. By exploring each category, you will gain the knowledge to build a personalized toolkit that empowers you to live more safely and independently.
Summary: A Practical Review of Independence-Restoring Gadgets
- Rocker knives vs Standard knives: cutting with arm strength instead of wrist pressure
- Button hooks and zipper pulls: dressing for a wedding without help
- Long-handled brushes: how to comb hair when you can’t raise your arm?
- Weighted cutlery: how to mask hand tremors while eating soup?
- Talking labels: using audio pens to identify spice jars or medication?
- Why muscle loss accelerates after 70 and how to spot the first signs?
- How to adjust bench height to match your specific knee-to-floor measurement?
- How to Optimize Home Living Areas for Maximum Safety Without Major Renovations?
Rocker knives vs Standard knives: cutting with arm strength instead of wrist pressure
For individuals with arthritis in the hands, wrists, or shoulders, the complex sawing motion required by a standard knife can be a significant source of pain. It demands a tight pinch grip and repeated wrist flexion, concentrating stress on already sensitive joints. The rocker knife fundamentally changes this dynamic. Instead of relying on fine motor control and wrist pressure, it utilizes a simple, downward press powered by the larger, stronger muscles of the arm and shoulder. This force distribution is the core ergonomic principle that restores an individual’s ability to participate in meal preparation.
The design is intuitive. A T-shaped or large, curved handle eliminates the need for a pinch grip, allowing the user to apply pressure with their whole palm or even both hands. The curved blade allows for slicing through food with a single, gentle rocking motion. This not only reduces pain but also significantly lowers the cognitive load of cutting, as it transforms a complex, multi-step action into one simple movement. As one user, Catherine del Pilar, noted in a product review, “This knife greatly reduces pain if one has arthritis in your hands and shoulders. I could not use a regular knife and was spending so much money purchasing pre-cut food.”
This paragraph introduces the key differences between these two types of knives, which are detailed in a comparative analysis. The following table breaks down the specific ergonomic and practical distinctions that make the rocker knife a superior choice for many users with limited hand strength.
| Feature | Rocker Knife | Standard Knife |
|---|---|---|
| Primary Motion | Single downward press with rocking | Complex sawing motion |
| Force Distribution | Uses arm and shoulder strength | Relies on wrist and finger pressure |
| Grip Required | Loose grip with T-handle or curved handle | Tight pinch grip needed |
| Learning Curve | Intuitive single motion | Requires coordination and practice |
| Maintenance | Harder to sharpen curved blade | Standard sharpening services available |
| One-Handed Use | Designed for single-hand operation | Requires both hands for safety |
| Cognitive Load | Minimal – simple press motion | Higher – complex coordination needed |
Occupational Therapist-Designed Adaptive Knife Success Story
An occupational therapist developed an adaptive stainless steel rocker knife that allows users to safely slice foods one-handed while reducing strain on fingers and wrists. Users report being able to return to food preparation after years of relying on pre-cut ingredients, with one user noting it became an essential daily tool they “never put far away.” This demonstrates the tool’s power to not just assist, but truly restore a cherished daily activity.
Button hooks and zipper pulls: dressing for a wedding without help
Dressing for a special occasion should be an act of joyful anticipation, not a struggle against your own clothing. For those with limited fine motor skills, the small buttons on a formal shirt or the tiny pull on a dress zipper can become insurmountable obstacles, forcing a reliance on others that chips away at dignity. Button hooks and zipper pulls are small, discreet tools that restore the independence of dressing. The key is their ability to translate a difficult pinch-and-pull motion into a simpler, more manageable gross motor task. A button hook’s wire loop slips through the buttonhole, hooks the button, and allows you to pull it through using a steady grip on a larger handle.
This illustration shows how an elegantly designed button hook can be used with formal wear, allowing for precise control with minimal hand strain.
Similarly, a zipper pull attaches a larger ring or loop to a small zipper tab, making it easy to grasp and pull. The true value of these tools is their ability to empower someone to navigate a high-stakes social event like a wedding with complete autonomy. The focus shifts from the disability to the celebration. Choosing a slim, pocket-sized model that can be carried discreetly in a clutch or jacket pocket adds another layer of confidence, ensuring that you’re prepared for any wardrobe adjustments throughout the day without drawing attention to the tool itself. It’s a prime example of task-oriented independence, where the tool is a means to a much more meaningful end.
Long-handled brushes: how to comb hair when you can’t raise your arm?
Limited shoulder range of motion, a common issue with arthritis, can make personal grooming tasks like combing hair or washing your back seem impossible. Long-handled brushes and combs are the obvious solution, but a truly strategic approach involves thinking in terms of a system integration rather than a single tool. The most effective solutions feature a single, ergonomically designed long handle with a set of interchangeable heads—a brush, a comb, a loofah, a shoe horn, and more. This “system” approach is more cost-effective and efficient than buying multiple single-use tools, providing a comprehensive solution for a wide range of daily living challenges.
The ergonomic principle at play is simple leverage. The extended handle allows you to reach any part of your body while keeping your elbow and shoulder in a comfortable, neutral position. However, the handle itself is a critical component. A standard thin handle can still require a tight, painful grip. This is where customization becomes key. According to an assistive devices guide from the Arthritis Society Canada, adding foam tubing can increase handle diameter by 1.5-2 inches, which can reduce the required grip force by a significant margin. This simple, low-cost modification transforms a good tool into a great one, perfectly tailored to your specific needs.
This multi-functional approach speaks directly to the need for value and efficiency. It eliminates clutter and ensures that with one core purchase, you’ve solved multiple problems related to personal independence. It is a perfect example of how an adaptive ecosystem can be built from just a few versatile components, restoring dignity to private, personal care routines.
Weighted cutlery: how to mask hand tremors while eating soup?
For individuals with essential tremors or ataxia, the simple act of eating, especially liquids like soup, can become a source of anxiety and embarrassment in social settings. Weighted cutlery offers a non-pharmacological solution by leveraging a basic principle of physics: increased mass dampens tremors. The added weight in the handle provides proprioceptive feedback to the hand, helping to stabilize unintended movements and allowing for a smoother, more controlled path from the bowl to the mouth. This can be the difference between dining out with confidence and avoiding social meals altogether.
However, more weight is not always better. As the occupational therapy team at EquipMeOT advises, “Starting with 6-8 oz weighted utensils provides optimal tremor dampening for most users. Too little weight is ineffective, while too much causes rapid muscle fatigue, defeating the tool’s purpose.” This highlights the importance of a personalized, review-focused approach. It’s not just about buying a weighted spoon; it’s about finding the optimal weight that provides stability without causing undue strain.
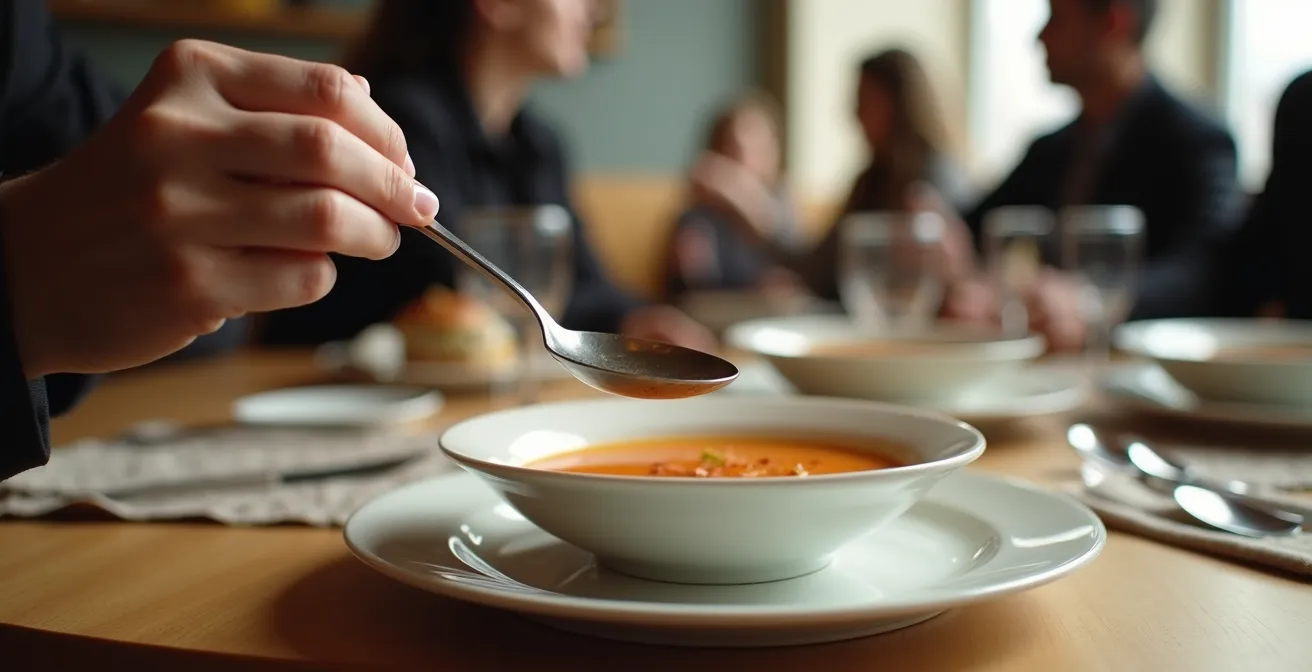
To maximize effectiveness, weighted utensils should be part of a larger dining system. Pairing them with high-rimmed scoop plates or bowls helps trap food, making it easier to get onto the spoon. Using a non-slip placemat underneath adds another layer of stability, preventing the plate from sliding. This holistic approach transforms the dining experience, restoring not just a physical function but also the social confidence that is so integral to a high quality of life. Answering the common question, “What is the best eating utensil for tremors?” requires looking beyond the utensil itself to the entire dining environment.
Talking labels: using audio pens to identify spice jars or medication?
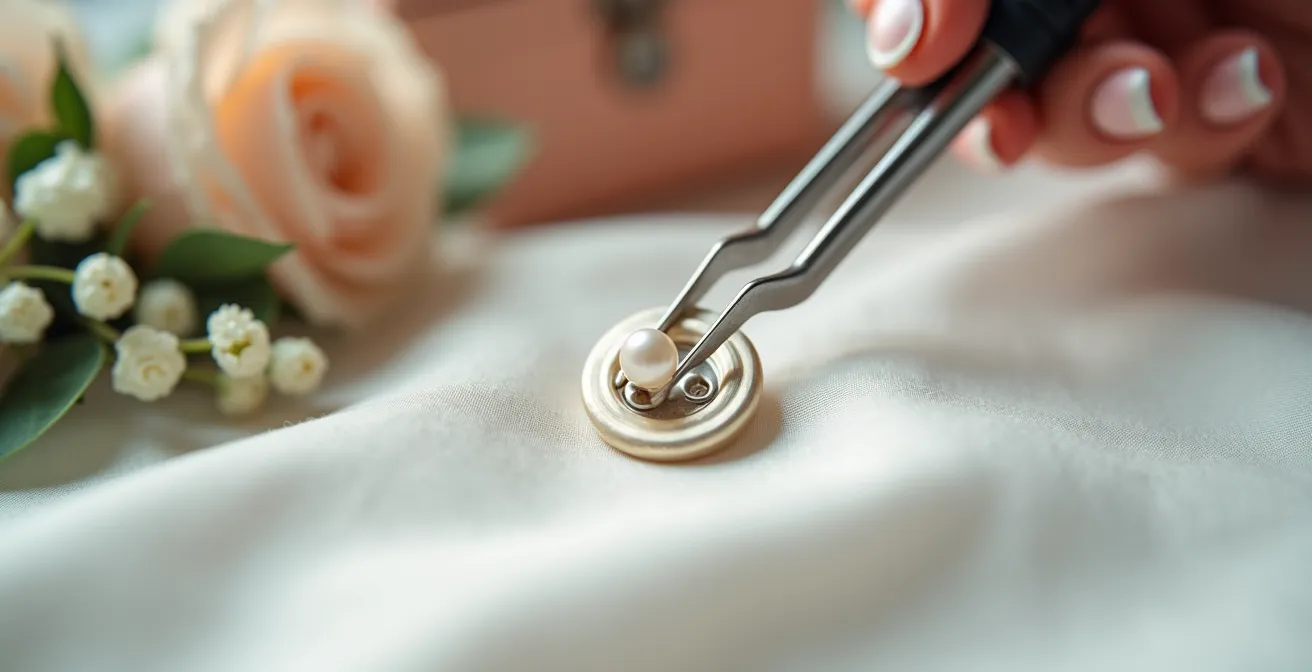
For those with both arthritis and low vision, identifying small items like spice jars or medication bottles can be a daily source of frustration and, in the case of medication, significant danger. While low-tech solutions like large print labels or tactile bumps are useful, they have limitations. Large print is useless in poor lighting, and tactile bumps can only provide simple binary information (e.g., one bump for morning, two for evening). Audio labeling systems, such as a talking pen, offer a far more robust and safer solution, especially for complex needs. These systems use a pen-like device to read tiny, pre-recorded audio labels attached to items. This allows a user to record not just the name of a medication but also critical dosage information, timings, and potential side effects.
The primary barrier for users with arthritis is often the dexterity required to apply the small sticker labels. However, this can be overcome by using simple tools like tweezers for placement and by recording information in short, manageable sessions. One case study highlighted a senior with multiple medications who successfully implemented an audio labeling system. The system was credited with preventing several potential medication errors within the first month, proving its value as a critical safety tool. It’s a powerful example of how technology can reduce both physical and cognitive strain, restoring confidence in managing one’s own health.
The decision to invest in an audio pen involves weighing cost against functionality. This table, based on information from assistive technology guides, breaks down the trade-offs between different labeling solutions for users with arthritis and low vision.
| Solution Type | Cost | Setup Difficulty | Best Use Case |
|---|---|---|---|
| Audio Pen Labels | $80-150 | High (requires dexterity for stickers) | Complex medication schedules with dosage info |
| Tactile Bumps | $5-10 | Low | Simple binary identification (morning/evening) |
| Color-Coded Lids | $10-20 | Very Low | Visual learners with good color vision |
| Large Print Labels | $5-15 | Low | Users with some vision, simple text needs |
| Braille Labels | $20-30 | Medium | Braille-literate users |
Why muscle loss accelerates after 70 and how to spot the first signs?
Many of the challenges that lead us to seek out adaptive tools are not just caused by joint pain, but are compounded by an underlying, age-related process called sarcopenia—the progressive loss of skeletal muscle mass and strength. While this process begins much earlier in life, its acceleration after the age of 70 is often what pushes daily tasks from manageable to difficult. This loss of muscle power is the reason a once-manageable cast-iron skillet suddenly feels impossibly heavy, or why opening a new jar requires more effort than it used to.
Recognizing the early signs of sarcopenia is crucial because it helps distinguish between challenges caused by joint pain and those caused by declining muscle strength. This distinction is key to choosing the right interventions. While arthritis may make gripping painful, sarcopenia is what makes the overall lift feel heavy. The problem is widespread, impacting millions and compounding the difficulties of daily living for those already managing joint conditions. Spotting the signs in the context of everyday kitchen activities can be a powerful first step toward addressing the issue through both adaptive tools and targeted exercise.
You don’t need a medical diagnosis to notice the initial signs. The following checklist can help you identify a potential decline in muscle strength based on your daily kitchen experiences:
- A cast-iron skillet suddenly feels too heavy to lift with one hand.
- You are struggling to open new jars that were manageable just 6 months ago.
- You find yourself needing to use both hands for tasks you previously did with one, like carrying a pot.
- You avoid cooking meals that require standing for more than 10-15 minutes due to fatigue.
- You are dropping lightweight items like plastic measuring cups or utensils more frequently.
- You find yourself choosing pre-cut vegetables more often due to hand fatigue from chopping, not just joint pain.
How to adjust bench height to match your specific knee-to-floor measurement?
One of the most effective ways to conserve energy and reduce strain in the kitchen is to work while seated. However, using a chair or stool that is the wrong height can create new problems, such as back strain or difficulty standing up. The ideal seat height is one that is perfectly customized to your body. As the editorial team at Arthritis Wares notes in their guide, “The right height makes the sit-to-stand motion significantly easier.” The goal is to create a stable and ergonomic workstation that allows you to prep food comfortably while minimizing the effort required to transition between sitting and standing.
The optimal height allows your thighs to be parallel to the floor with your feet resting flat. This 90-degree knee angle is the gold standard for ergonomic seating, as it distributes weight properly and reduces stress on the lower back and knees. Taking the time to find your personal ideal measurement is a one-time task that pays dividends in daily comfort and safety. You don’t need fancy equipment; a firm chair and some books or cushions are all it takes to conduct your own assessment.
This simple process empowers you to shop for a new kitchen stool with confidence or adjust an existing one for maximum benefit. It is a foundational element of creating an arthritis-friendly kitchen.
Your Action Plan: The DIY Kitchen Stool Height Assessment
- Sit on a firm, flat chair. Stack sturdy books or firm cushions on the seat until your feet are resting flat on the floor.
- Check your posture. Your thighs should be roughly parallel to the floor, creating a 90-degree angle at your knees.
- Carefully get up and use a tape measure to record the total height from the floor to the top of your stack of books/cushions.
- This measurement is your personal target height for any kitchen stool, perching stool, or office chair.
- Test the sit-to-stand motion from this height. If you still need to use your arms to push off, add another 1-2 inches to the height for an easier transition.
As confirmed by a guide on comfort-enhancing arthritis kitchen tools, this personalized measurement is a critical piece of data for creating a truly ergonomic workspace.
Key Takeaways
- Adaptive tools are most effective when chosen to solve a specific task, not just as a generic aid.
- Look for designs that transfer effort from small, painful joints (fingers, wrists) to larger muscle groups (arms, shoulders).
- True independence often comes from a system of tools and environmental changes working together, not from one magic gadget.
How to Optimize Home Living Areas for Maximum Safety Without Major Renovations?
Creating a safer home environment doesn’t have to mean expensive and disruptive renovations. The most impactful changes are often small, strategic, and low-cost. The guiding principle is to reduce the number of times you have to lift, carry, and bend. This can be achieved by bringing the tools to the task, rather than the other way around. Simple additions like motion-activated LED strips under kitchen cabinets can dramatically improve visibility for food prep, while replacing standard bulbs with “daylight” temperature (5000K) bulbs makes it easier to discern colors and details, reducing the risk of mistakes.
Another powerful, low-cost strategy is to improve stability throughout the environment. This can be as simple as using non-slip placemats under plates and cutting boards, or adding contrasting colored tape to the edges of countertops to improve depth perception and prevent items from being knocked off. These small adjustments create an ecosystem of safety that works passively in the background to support your independence and reduce the cognitive load of constantly having to be “on guard.”
The Rolling Cart Revolution for Kitchen Safety
A simple rolling utility cart can be one of the most effective safety tools in the home. One senior living community reported that residents who adopt these carts as “mobile countertops” effectively eliminate the most dangerous kitchen task: carrying heavy pots or hot dishes across the floor. Residents use their carts to transport ingredients from the pantry, as extra prep space next to the stove, and even to bring groceries from the car to the kitchen in a single, safe trip. A case study from the Carlisle Palm Beach community highlights how this simple tool significantly reduces both fall risk and joint strain without any structural changes to the home.
Ultimately, optimizing your home is about thinking like an efficiency expert. Every step saved, every heavy item not lifted, and every corner made brighter contributes to a greater sense of security and control. It’s about making smart, targeted changes that deliver the maximum safety benefit for the minimum cost and effort.
By understanding the principles behind these tools and making small, strategic adjustments to your home, you can build a powerful system that restores not just function, but the confidence and dignity that come with true independence. The next logical step is to begin assessing your own daily routines to identify where the right tool could make the biggest difference.