In summary:
- A true safety audit requires you to see the environment through an aging adult’s eyes, recognizing how changes in vision and balance create “invisible” hazards.
- Focus on environmental forensics: identify visual noise from patterns, camouflage from cords, and perceptual gaps from poor contrast.
- Balance is a fragile three-part system (vision, inner ear, body awareness) that is easily compromised in darkness or by simple reaching motions.
- Your audit must be dynamic, accounting for changing seasonal light and its effect on shadows and glare, which create new daily risks.
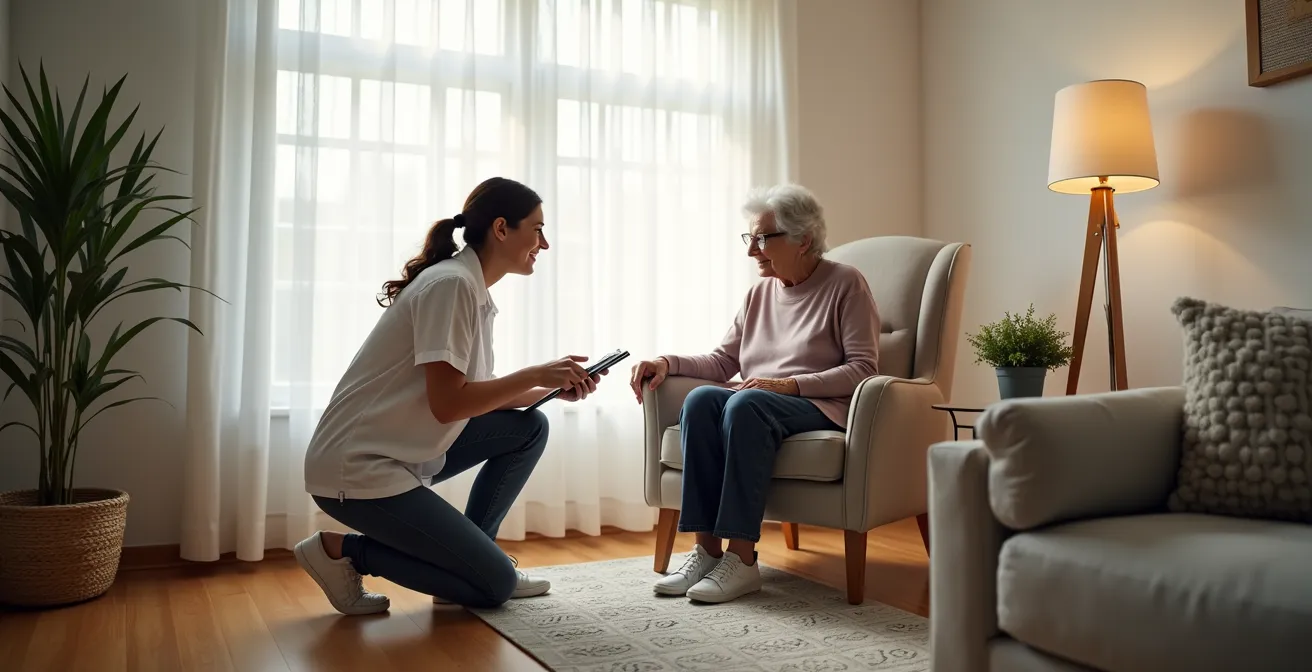
You have a limited window of time during your visit with an aging parent. The house looks the same as it always has—clean, familiar, and safe. But a nagging worry persists. The statistics on senior falls are alarming, and the most common advice feels too generic. You’re told to remove clutter and install grab bars, but the real dangers are often the ones you can’t immediately see. These are the hidden hazards woven into the very fabric of the home, invisible to a visitor but treacherous for an occupant with changing physical needs.
This is not about a simple tidying-up. A truly effective safety audit, one you can complete in under an hour, is an exercise in environmental investigation. The fundamental shift is to stop looking at the house as you see it and start seeing it through their eyes. What if the real key wasn’t just spotting obvious obstacles, but understanding how aging vision turns a favorite patterned rug into a minefield of “visual noise”? Or how a perfectly placed extension cord becomes an invisible tripwire due to “environmental camouflage”? This is where a quick, focused audit becomes a powerful, life-saving tool.
This guide will equip you with an investigator’s mindset. We will move room by room, not just looking for hazards, but understanding the science behind why they are so dangerous for seniors. You will learn to spot the subtle, hidden risks tied to vision, balance, and perception, turning your brief visit into a critical opportunity to prevent the next fall.
For those who prefer a visual format, the following video offers an excellent overview of how professionals conduct a balance and falls risk assessment, complementing the hands-on audit techniques you are about to learn.
To conduct this audit effectively, we’ll follow a structured approach. The following sections break down the key areas of investigation, providing the “why” behind each hazard and the “how” for identifying and neutralizing it. This is your roadmap to a safer home environment.
Summary: A Forensic Guide to Uncovering Hidden Home Hazards
- How to conduct a room-by-room safety sweep like a pro?
- Why patterns on carpets can deceive aging eyes and cause trips?
- The extension cord placement that creates an invisible tripwire
- High-contrast markers: using tape to define step edges cheaply
- When to re-evaluate the home: the pre-winter safety check protocol
- Why seniors are more susceptible to CO poisoning and where to place detectors?
- Why tactile searching for light switches causes balance loss in the dark?
- Creating a Hazard-Free Kitchen: How to Prevent Burn and Fire Risks for Seniors?
How to conduct a room-by-room safety sweep like a pro?
Forget tidying up; you’re here to conduct a forensic investigation. A professional safety sweep isn’t about cleanliness, it’s about seeing the potential for injury in everyday objects. Your mission is to adopt an investigative mindset and scan each room not for what is out of place, but for what is dangerously in place. Start at the main entrance and work your way through the house, focusing on the paths your parent travels most frequently: from the bedroom to the bathroom, from the living room to the kitchen.
For each room, stand in the doorway and then in the center. Your first scan should be at floor level. Look for what we call “environmental camouflage”—hazards that blend in. Then, scan at shin-to-knee height, the prime zone for tripwires. Finally, assess reach-level hazards, such as high shelves that encourage the use of unstable step stools. Document with your phone’s camera. A quick photo of a hazard is faster than writing a note and more powerful for explaining the needed change later.
Think in terms of “if-then” scenarios. If the phone rings, what is the path to get to it? Is it clear? If they wake up at night, what is the journey to the bathroom like in low light? This scenario-based analysis is what separates a simple check from a professional sweep. You are not just listing items; you are analyzing behaviors and predicting points of failure in the environment. This mindset is the foundation for everything else you are about to uncover.
Why patterns on carpets can deceive aging eyes and cause trips?
That busy, patterned rug in the living room may seem harmless, but to an aging eye, it’s a landscape of visual confusion. As we age, our contrast sensitivity naturally declines. This makes it significantly harder to distinguish an object from its background. A busy carpet pattern creates what specialists call “visual noise,” a chaotic field that can easily camouflage a dropped item, a pet, or even one’s own feet. The brain has to work overtime to process the scene, leading to hesitation, a sudden loss of balance, or an attempt to step over a non-existent obstacle within the pattern.
According to the National Council on Aging, this difficulty in distinguishing foreground from background is a major contributor to fall risk. A beige pill dropped on a multi-tonal beige carpet becomes effectively invisible. This isn’t a matter of carelessness; it’s a physiological trap. The perceived depth of the floor can become distorted, making a flat surface appear uneven and treacherous.
You can quickly test the contrast levels in the home yourself. Use these simple checks to see the environment as your parent might:
- The Sock Test: Place a beige or light-colored sock on the most patterned carpet. Step back 10 feet. If it’s difficult to see, the contrast is too low.
- The Tissue Test: Drop a white tissue on any light-colored flooring (like linoleum or tile). It should be clearly visible from a standing height.
- The Camera Test: Use your smartphone camera’s black-and-white mode. This removes color distraction and reveals the true contrast levels between objects and surfaces.
- The Edge Test: Check where rugs meet the floor. As a case study by the NCOA documents in its fall prevention facts, a dark rug on a light floor can appear as a hole or a step-down to an eye with diminished perception.
The extension cord placement that creates an invisible tripwire
Extension cords are a modern necessity, but their placement often creates the most insidious of fall hazards: the invisible tripwire. The danger isn’t the bright orange construction cord in the middle of the floor; it’s the beige cord running along a beige baseboard, or the thin black phone charger cable stretched across a dark pathway. This is “environmental camouflage” at its most dangerous. Because it blends in, the brain doesn’t register it as a threat, especially for someone with decreased visual acuity or who is distracted.
The most treacherous cords are those positioned at shin height—stretched taut from a wall outlet to a recliner or between a lamp and a sofa. They exist in a visual blind spot, below eye level but high enough to catch a foot mid-stride, leading to a forward fall with no time to react. The risk is so significant that it’s a key factor in why more than 25% of seniors report falling each year, according to data cited by the National Safety Council.
This image illustrates several common but dangerous cord placements that can create nearly invisible hazards in a typical living space.
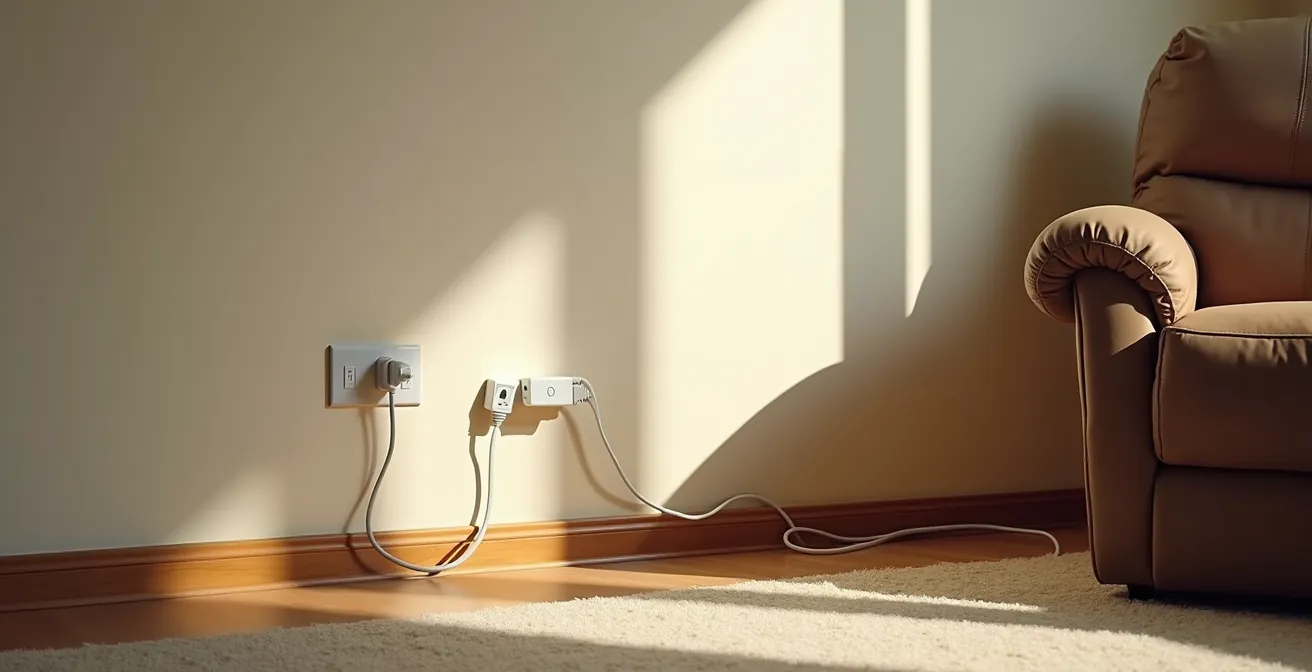
During your audit, get low and look for these specific tripwires. Pay special attention to the areas around favorite chairs, bedsides, and entertainment centers. Tugging gently on a visible cord may reveal a long, dangerous tail snaking across a walkway. The goal is to run all cords along walls and behind furniture, or to use cord covers that contrast with the floor, making them visible and secure.
High-contrast markers: using tape to define step edges cheaply
Once you’ve identified areas with poor contrast, the solution doesn’t have to be expensive or complicated. One of the most effective and affordable interventions is the strategic use of high-contrast tape. This simple tool turns a “perceptual gap”—where the eye fails to see a change in elevation—into a clear, unmissable visual cue. It’s particularly critical for single steps, thresholds between rooms, and the top and bottom stairs of a staircase, which are the most common locations for missteps.
As a case study from Fellowship Senior Living demonstrated, applying high-contrast tape to transitions between different flooring types, such as from wood to tile, significantly reduced fall incidents. These subtle elevation changes often go unnoticed but are easily highlighted with a strip of tape. The key is to choose a color that starkly contrasts with the flooring material. Don’t assume black or yellow is always best; on a dark floor, white or silver tape is far more effective.
The type of tape you use matters, as each has a specific application for maximizing safety. This table, based on recommendations from safety bodies like the Consumer Product Safety Commission, breaks down the best options.
| Tape Type | Best Use Case | Pros | Cons | Cost |
|---|---|---|---|---|
| Gaffer Tape | Indoor stairs, dark hallways | Matte finish prevents glare, strong adhesion, removable | More expensive initially | $15-25/roll |
| Reflective Safety Tape | Outdoor steps, garage entries | Visible in low light, weather-resistant | Can create glare in bright sun | $10-20/roll |
| Anti-Slip Tape | Bathroom, kitchen transitions | Provides traction plus visibility | Rougher texture, harder to clean | $12-18/roll |
| Photoluminescent Tape | Bedroom to bathroom routes | Glows in dark without electricity | Needs light exposure to charge | $20-30/roll |
Applying a strip of tape takes minutes but provides a constant, reliable visual guide that can prevent a life-altering fall. It is one of the highest-impact changes you can make during your one-hour audit.
When to re-evaluate the home: the pre-winter safety check protocol
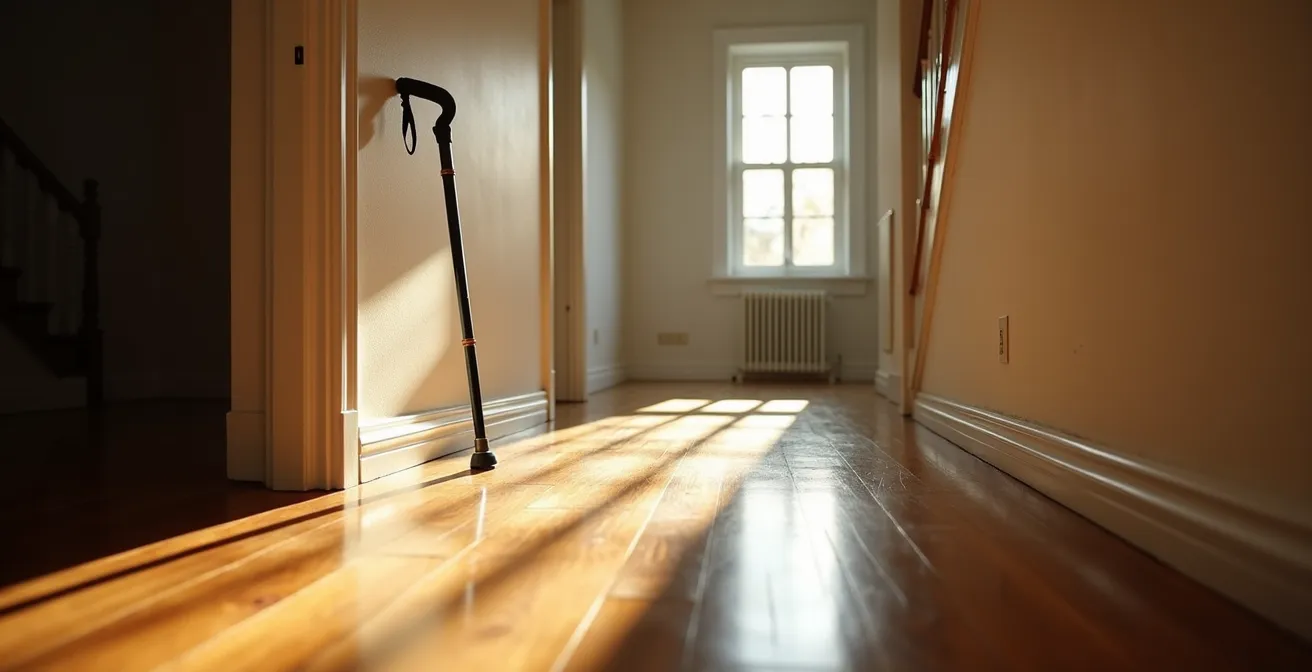
A home safety audit is not a one-time event. The environment is dynamic, and no time of year highlights this more than the transition into winter. Lower sun angles, earlier sunsets, and changes in daily routines create a completely new set of hazards. A space that was safe in the summer can become dangerous in the fall and winter. Therefore, a seasonal re-evaluation is not just recommended; it’s critical.
The most important seasonal audit is the pre-winter check. As the days shorten, natural light diminishes, and the low-angle winter sun creates long, disorienting shadows and blinding glare across floors. These new patterns can easily obscure hazards or be mistaken for obstacles themselves. This is why a proactive check, timed with the changing season, is a core professional protocol.
This image demonstrates how dramatic winter sun can create confusing patterns of light and shadow in a simple hallway, posing a significant risk.
Instead of waiting for an incident, use the first frost as your trigger to perform a focused, 15-minute seasonal sweep. This ensures the home is prepared for the specific challenges winter brings.
Your Pre-Winter Safety Check Protocol
- First Frost Trigger: Schedule the assessment within 48 hours of the first frost. This is your cue to address changes in footwear (from slippers to bulkier, less-tactile shoes) and the increased risk of bringing wet or icy soles indoors.
- Sunlight Angle Audit: Document shadow and glare patterns at 9 am, noon, and 3 pm. Note where the low sun creates blinding spots or casts long shadows that could hide a trip hazard. Consider sheer curtains to diffuse glare.
- Heating System Check: Test the heating system. Dry air from furnaces can contribute to dehydration, which causes dizziness and balance issues. Also, check for condensation near windows that could create slick spots on the floor.
- Winter Clothing Assessment: Evaluate the accessibility of storage for heavy coats and boots. Is there a safe, stable place to sit while putting on or taking off winter footwear? Avoid cluttering entryways.
- Emergency Supply Review: Ensure flashlights have fresh batteries and are easily accessible. Confirm that ice melt or salt is stored where it can be reached without venturing onto a slippery porch. Post emergency numbers in large, clear print.
Why seniors are more susceptible to CO poisoning and where to place detectors?
While falls are a primary focus, your audit must also cover other invisible threats, and none is more silent or deadly than carbon monoxide (CO). Seniors are uniquely susceptible to CO poisoning for several reasons. First, the early symptoms—headache, fatigue, dizziness, and confusion—are often mistaken for the flu or other age-related conditions, leading to delayed diagnosis. Second, physiological changes can make older adults more vulnerable to the effects of CO at lower concentrations.
This is a critical intersection of risks. The dizziness and confusion caused by CO poisoning can directly lead to a fall. An older adult may feel unsteady and not realize it’s an environmental toxin, not a personal health issue. This makes the consequences of an undetected CO leak catastrophic, a fact underscored by the stark reality that falls are a leading cause of fatal injury. Indeed, 38,000 deaths among adults 65+ from falls in 2021 were reported by the CDC, and any condition that impairs balance increases this risk.
Because of this heightened vulnerability, the placement of CO detectors is not just a suggestion; it’s a non-negotiable safety mandate. Proper placement is crucial for early detection. The goal is to place alarms where they will be heard and where they can monitor the air near sleeping areas and fuel-burning appliances. Based on CPSC guidelines, follow this priority list for placement:
- Priority 1 (Essential): Install a detector in the hallway directly outside the primary bedroom. It should be placed at head height when standing, not near the floor, as CO mixes with air.
- Priority 2 (Crucial): Place an additional detector in any room or basement area that contains a gas-powered appliance, such as a furnace, water heater, or clothes dryer.
- Priority 3 (Recommended): If the home has an attached garage, add a detector in the room or hallway adjacent to the garage entry door to protect against fumes from a running car.
Finally, detectors are useless if not maintained. Use the test button monthly and write the date on a piece of tape on the unit. A simple and effective memory aid is to replace the batteries every time the clocks are changed for daylight saving time.
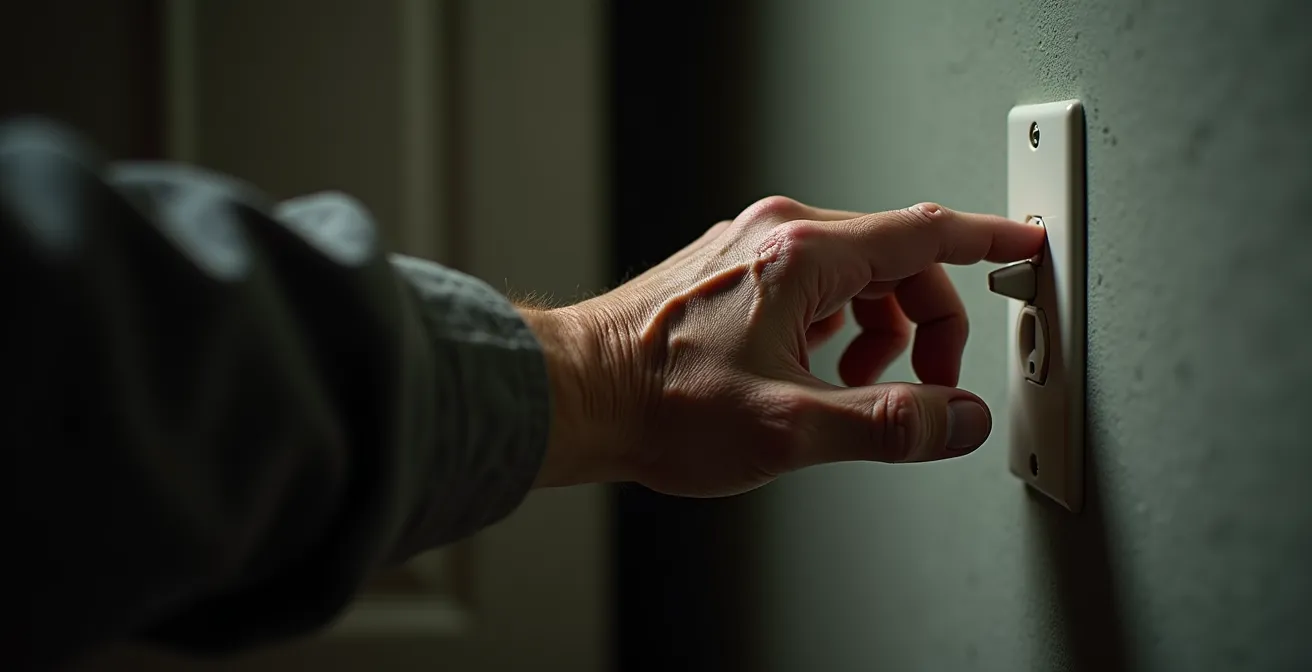
Why tactile searching for light switches causes balance loss in the dark?
A simple act that a younger person performs without a thought—reaching for a light switch in the dark—is a high-risk maneuver for a senior. The reason lies in the delicate science of equilibrium, often called the “Tripod of Balance.” Our ability to stay upright relies on constant input from three systems: our vision (sight), our vestibular system (inner ear), and our proprioception (the sense of our body’s position in space).
In a dark room, the visual system is eliminated. The body is suddenly forced to rely solely on the vestibular system and proprioception. When a senior then leans or reaches, shifting their center of gravity to feel for a switch on the wall, they are over-taxing this already compromised two-legged stool. As a home safety assessment from Age Safe America demonstrates, this precise moment—the loss of visual input combined with a change in posture—is a peak time for balance loss and falls.
The intimate, disorienting experience of searching for a switch in the dark is a moment of extreme vulnerability, as captured in this close-up view.
The solution is not to tell them to “be more careful.” The solution is to eliminate the need to search in the first place. Your audit should identify every pathway that requires a tactile search for light. Fortunately, modern, affordable technology offers numerous ways to solve this problem:
- Glow-in-the-dark switch plates: These absorb light during the day and provide a clear visual target at night.
- Motion-sensor LED strips: Placed along baseboards in hallways and bathrooms, these provide automatic, low-level pathway lighting.
- Voice-activated smart plugs: For a bedside lamp, a command like “Alexa, turn on the light” provides immediate illumination without any movement.
- Tap-activated LED pucks: Placing one of these on a nightstand or bathroom counter offers instant light with a simple touch.
- Photoelectric nightlights: These modern nightlights turn on automatically only when the room is dark, providing constant, low-cost safety.
Key takeaways
- Your most powerful tool is seeing the world through aging eyes, where low contrast and busy patterns create “visual noise” that hides real dangers.
- Balance is a fragile tripod (vision, inner ear, body awareness); removing one leg (vision in the dark) and then leaning makes a fall highly probable.
- A home’s hazards are not static; you must re-evaluate safety with the seasons, as changing light creates new and disorienting shadows and glare.
Creating a Hazard-Free Kitchen: How to Prevent Burn and Fire Risks for Seniors?
The kitchen is often called the heart of the home, but for seniors, it is statistically the most dangerous room. The risks extend beyond falls to include serious burns, fires, and scalds. Cognitive changes, decreased sensation in the hands, or mobility issues can make everyday cooking tasks hazardous. An audit of the kitchen must focus on minimizing these specific risks with smart, often automated, solutions.
Reaching over a hot stove to get something from a cabinet, forgetting a pot is on the burner, or being unable to quickly move a heavy pot of boiling water are all common scenarios for injury. Your goal is to identify these potential failure points and suggest modifications that build a “cushion” of safety. This can involve rearranging storage to put frequently used items at counter level or, more effectively, integrating modern safety technology.
Many automatic devices are now available to mitigate the most common kitchen dangers, especially for individuals with memory concerns or physical limitations. They act as a silent guardian, intervening before a moment of forgetfulness becomes a disaster.
This table outlines some of the most effective automatic safety devices that can create a hazard-free kitchen environment.
| Device Type | Primary Function | Installation | Cost Range | Best For |
|---|---|---|---|---|
| Automatic Stove Shut-off | Turns off stove after inactivity | Professional required | $200-500 | Memory concerns |
| Induction Cooktop | Only heats cookware, not surface | Plug-and-play models available | $50-1500 | Burn prevention |
| Motion-Sensor Faucet | Prevents overflow, scalding | DIY or plumber | $100-300 | Arthritis, cognitive issues |
| Microwave at Counter Level | Eliminates reaching over stove | Furniture rearrangement | $0-200 | Mobility limitations |
Implementing even one of these solutions can drastically reduce the risk of a kitchen-related accident. The investment in an induction cooktop or an automatic stove shut-off device is minor compared to the physical and emotional cost of a serious burn or a house fire.
You now possess a new lens through which to see a familiar space—one that reveals the hidden dangers of visual noise, environmental camouflage, and the fragile nature of balance. This one-hour investment in a forensic audit is the most powerful preventative step you can take. Your next move is to turn these observations into a simple, prioritized action plan to create a genuinely safe harbor for your loved one.