In summary:
- Effective senior home safety is less about expensive construction and more about strategic, low-cost adjustments to furniture, lighting, and daily habits.
- The biggest risks often hide in plain sight: “organized clutter” that overloads the brain and seemingly harmless rugs that act as tripwires.
- A systematic, one-hour audit, viewing the home from a “walker’s-eye view,” is the most powerful tool to uncover and neutralize these hidden dangers.
- Focus on creating predictable pathways, maximizing visual contrast, and keeping essential items within an ergonomic reach zone to drastically reduce fall risk.
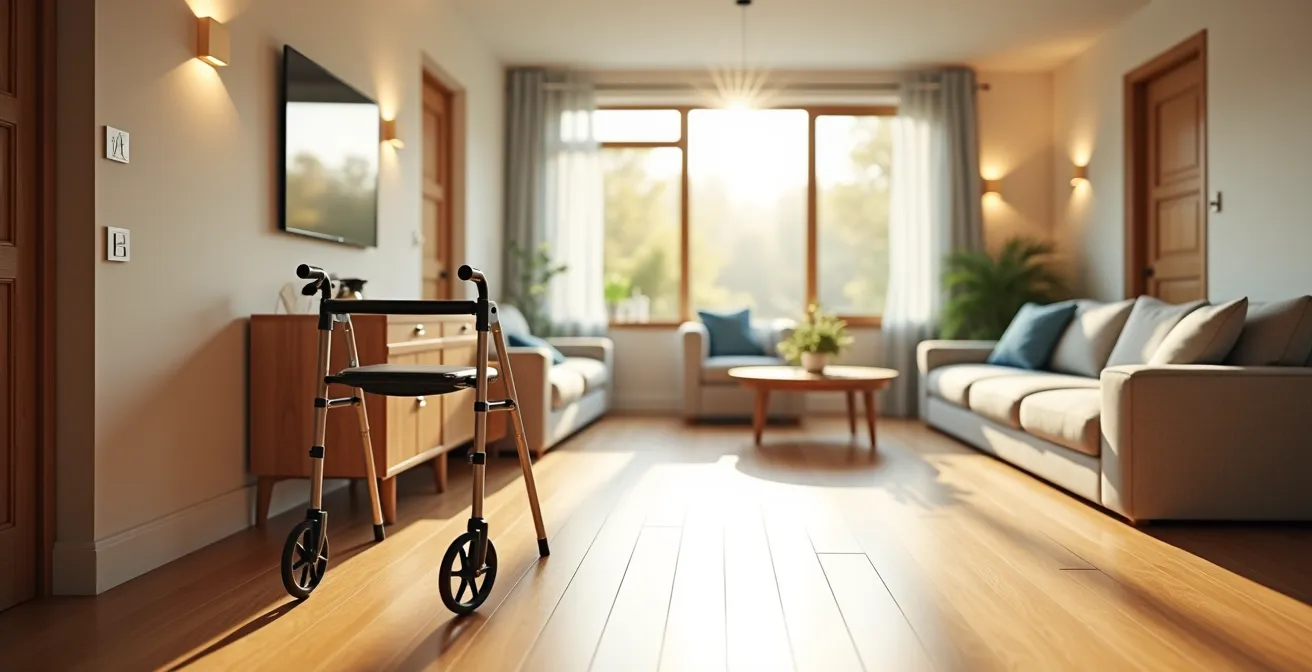
The fear of a loved one falling at home is a constant source of anxiety for many families. We are often told the solutions are straightforward: declutter the house, improve the lighting, and get rid of throw rugs. While well-intentioned, this advice barely scratches the surface. It treats the home as a static environment and fails to address the complex interaction between an aging person and their surroundings. True safety isn’t just about removing items; it’s about understanding the “why” behind the hazards.
As a certified aging-in-place specialist, I see homes not as collections of objects, but as interactive systems. Every piece of furniture, every light source, and every pathway either supports or compromises stability. The real key to safety without costly renovations is to reduce cognitive load and increase predictability. It’s about shifting the perspective from merely ‘cleaning up’ to strategically engineering a supportive environment. This means considering how aging eyes perceive contrast, how much mental energy is spent navigating a room, and how a space feels from a wheelchair or with a walker.
This guide moves beyond the platitudes. We will dissect the most common, yet overlooked, household dangers and provide practical, low-cost strategies to neutralize them. We will explore how to arrange furniture to create clear, intuitive pathways, make informed choices between smart tech and physical aids, and conduct a professional-grade safety audit in under an hour. By the end, you will have a new framework for seeing the home—not as a minefield of risks, but as a space that can be optimized for safety, independence, and peace of mind.
This article provides a detailed roadmap to systematically enhance home safety. The following sections break down key risk areas and offer actionable solutions, guiding you through a process that transforms a familiar space into a secure environment.
Summary: A Specialist’s Guide to Senior-Proofing Your Home Without Renovations
- Why “organized clutter” is the number one cause of falls in the living room?
- How to arrange living room furniture to create clear pathways for walkers?
- Smart home automation or physical adaptations: which is more reliable for safety?
- The rug mistake that sends thousands of seniors to the ER every year
- How to increase lumen output in hallways without rewiring the house?
- Cleaning without fumes: why bleach and ammonia are dangerous for aging lungs?
- How to conduct a room-by-room safety sweep like a pro?
- How to Audit a Senior’s Living Space for Hidden Fall Hazards in Under an Hour?
Why “organized clutter” is the number one cause of falls in the living room?
The most insidious fall risk in a senior’s home is not the obvious pile of mess; it’s the “organized clutter.” This refers to items that have a “place” but collectively create a visually and physically complex environment. Stacks of magazines by a chair, a collection of shoes by the door, or a line of decorative items on the floor may seem tidy, but they place a heavy cognitive load on the brain. For an aging mind, processing this excess visual information slows reaction time and diverts attention from the primary task of walking safely. Each item is another piece of data to navigate around, increasing the chance of a misstep.
This issue is a leading contributor to domestic accidents. In the U.S. alone, over 14 million adults 65 and older fall each year, with a significant portion of these incidents occurring in familiar living spaces cluttered with personal belongings. The problem isn’t the items themselves, but their cumulative effect on navigation. To reduce this risk, the goal is to create “quiet” surfaces and floors. This involves establishing strict ‘landing zones’—a single tray for mail and keys, a basket for temporary items that is emptied daily, and a dedicated holder for all reading material. By minimizing the number of objects in a person’s line of sight and pathway, you free up crucial mental bandwidth for maintaining balance and stability.
Ultimately, simplifying the visual landscape of a room is as important as clearing a physical path. It transforms the environment from a challenging obstacle course into a serene and predictable space that supports, rather than taxes, the mind.
How to arrange living room furniture to create clear pathways for walkers?
Creating a safe living room for someone with a mobility aid is about more than just providing space; it’s about designing predictable pathways. Furniture should not be an obstacle but a navigational tool that guides movement. As recommended by specialists at the Mayo Clinic Health System, long pieces like sofas should be placed against walls to create clear, straight boundaries for walkways. This defines the “safe zone” for walking and prevents unexpected detours. The key is to establish a main-traveled route—from the favorite chair to the kitchen, bathroom, and entrance—and ensure it is completely unobstructed.
The most critical measurement for walker or wheelchair users is clearance. A minimum of 36 inches of clear width is the standard for comfortable passage and, more importantly, for turning. This “turn radius” is often overlooked. Coffee tables with sharp, square corners are notorious hazards; replacing them with round or oval tables eliminates a major point of injury and improves flow. The goal is to create a smooth, logical path that can be navigated almost on autopilot, reducing the mental effort required and minimizing the risk of catching the walker on a furniture leg or corner.
To better understand this spatial principle, the illustration below demonstrates an optimal layout that respects the necessary turning radius for a walker.
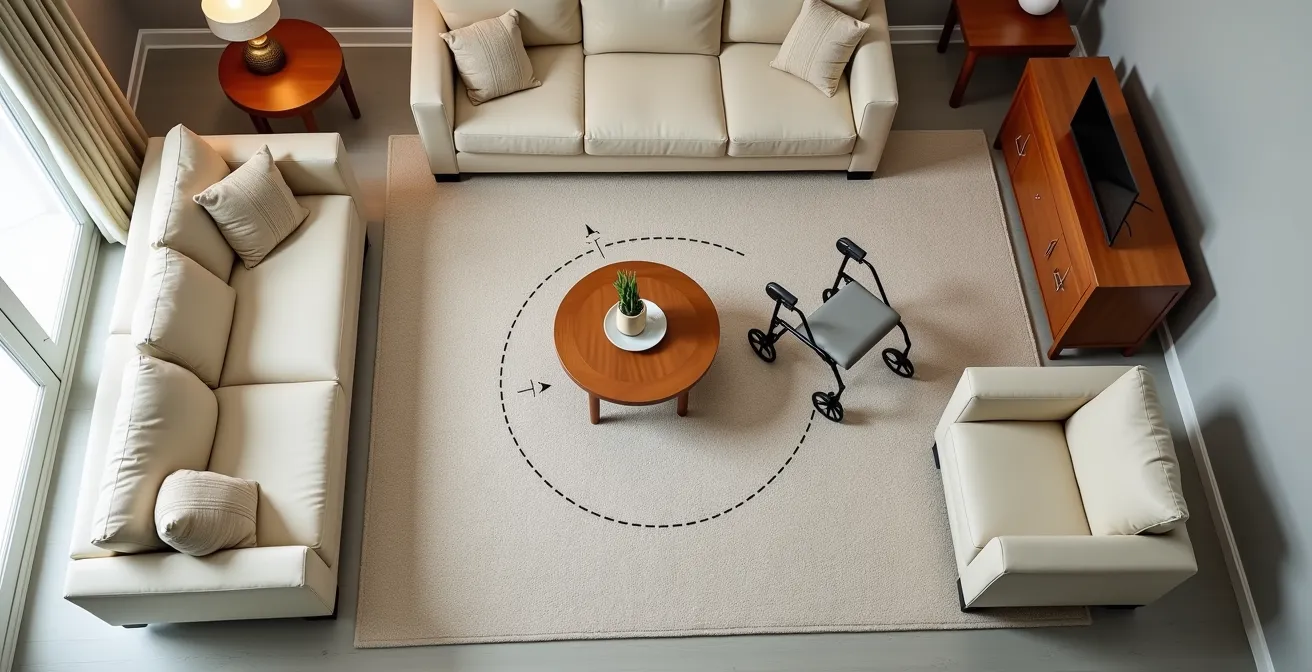
As this layout shows, the arrangement creates a sense of order and predictability. Furniture is used to define, not obstruct, the walking area. By thinking of furniture as the “banks” of a river, you can channel movement safely through the room, making every journey from point A to point B both intuitive and secure.
This strategic placement transforms the living room from a potential hazard zone into a functional, accessible space that empowers independence rather than limiting it.
Smart home automation or physical adaptations: which is more reliable for safety?
When deciding how to enhance home safety, families often face a choice between high-tech smart automation (like voice-activated lights or smart locks) and low-tech physical adaptations (like grab bars or lever-style door handles). As a specialist focused on practicality, the primary factor must always be reliability. A physical grab bar is 100% reliable; it has no batteries, requires no Wi-Fi, and has zero learning curve. Smart home devices, while powerful, introduce potential failure points: power outages, weak internet signals, or a senior forgetting a voice command under stress.
The best approach is not an “either/or” but a “both/and,” with a strong preference for physical adaptations for all critical safety functions. For instance, a physical, securely mounted grab bar next to a toilet is non-negotiable. A smart, motion-activated nightlight in the hallway is an excellent secondary layer of safety but should not be the *only* source of light. Cost and privacy are also key considerations. Physical adaptations are typically a one-time, lower-cost investment with no data privacy concerns. Smart systems can involve subscriptions and require a level of comfort with technology that may vary.
The following table breaks down the core differences to help guide your decision-making process for non-critical functions.
| Aspect | Smart Automation | Physical Adaptations |
|---|---|---|
| Reliability | Dependent on Wi-Fi/power | Always functional |
| Learning Curve | Requires tech adoption | Intuitive use |
| Cost | $200-2000 initial setup | $100-1000 one-time |
| Privacy | Data collection concerns | No privacy issues |
| Flexibility | Highly customizable | Fixed once installed |
Ultimately, technology should serve as an enhancement, not a foundation. Prioritize robust, simple, physical solutions for fall prevention and life-safety tasks first, and then layer on smart technology for convenience and added security where it makes sense.
The rug mistake that sends thousands of seniors to the ER every year
The single most dangerous object in a senior’s living room is often the throw rug. While intended to add warmth or style, its edges represent a tripwire for shuffling feet or mobility aids. A slightly curled edge or a rug that bunches up can have catastrophic consequences. The statistics are stark: up to 95% of hip fractures are caused by falls, and tripping over a rug is one of the most common culprits. The mistake is not the rug itself, but the failure to properly secure it or choose a safer alternative. A free-floating area rug on a slick wood or tile floor is an accident waiting to happen.
Removing all rugs is the safest, but not always the most practical, solution. Rugs provide warmth, noise dampening, and comfort. Therefore, the focus should be on making them as safe as possible. The number one rule is that no rug edge should ever be loose. Securing every edge with high-contrast, double-sided carpet tape is the bare minimum. The high-contrast color helps aging eyes better distinguish the transition from floor to rug. However, even a taped rug can pose a risk if its pile is too high, which can catch the front of a walker.
For those committed to safety, exploring alternatives to traditional area rugs is a wise investment. Wall-to-wall, low-pile (less than half an inch) carpeting is the gold standard, as it eliminates all edges. Other excellent options include modern cork flooring, which is naturally cushioned and warmer than wood, or simply using smaller, securely-taped mats in specific areas where a person stands for long periods, like in front of a favorite chair.
Action plan: Securing or replacing hazardous rugs
- Secure all existing rug edges with high-contrast, double-sided carpet tape, ensuring no corner or side can lift.
- If possible, replace high-pile or multiple area rugs with a single, professionally installed wall-to-wall low-pile carpeting.
- Consider installing cork flooring, which offers a warmer, more forgiving surface with no trip hazards.
- Place heated floor mats under any remaining small rugs, and ensure those rugs are securely taped over the mat.
- Ensure non-slip pads are placed under every single rug in the home, even those that are taped.
By treating every rug as a potential hazard and taking decisive action, you can neutralize one of the most frequent causes of serious injury for seniors at home.
How to increase lumen output in hallways without rewiring the house?
Dark or poorly lit hallways are like tunnels of risk for seniors, especially at night during trips to the bathroom. Many assume that improving this requires an electrician and costly rewiring, but several powerful, low-cost solutions can dramatically increase lumen output (the measure of visible light). The goal is to create even, consistent illumination that eliminates shadows and enhances visual contrast. This is critical for aging eyes, which require significantly more light than younger eyes to perceive depth and identify obstacles.
The most effective and affordable strategy is layering different types of plug-in lighting. First, install motion-activated LED light strips along the baseboards. As documented in studies by home care providers, these provide immediate, low-level light that guides the feet without being jarringly bright. Second, use powerful plug-in uplighters at either end of the hallway. These bounce light off the ceiling, creating soft, ambient illumination that fills the entire space. Finally, switch out all existing bulbs for 4000K-5000K “daylight” LED bulbs. Unlike warm yellow bulbs (2700K), these cooler-temperature bulbs produce a crisp, white light that mimics natural daylight, significantly improving clarity and contrast for those with vision impairments like cataracts.
Here are several effective plug-in solutions to brighten any hallway:
- Install powerful plug-in uplighters in corners to create ambient illumination.
- Add motion-activated LED light strips along the baseboards for nighttime navigation.
- Replace all existing bulbs with 4000K-5000K ‘daylight’ bulbs to improve contrast.
- Position a large mirror at the end of a hallway to reflect and double existing light.
- Place a small, plug-in table lamp on a console at the hallway’s end for an additional point of light.
By combining these non-permanent solutions, you can achieve professional-level lighting and dramatically improve hallway safety for a fraction of the cost and effort of a traditional electrical project.
Cleaning without fumes: why bleach and ammonia are dangerous for aging lungs?
Home safety extends beyond fall prevention; it also includes the air we breathe. For seniors, whose respiratory systems can be more sensitive, common household cleaning agents like bleach and ammonia pose a significant, often underestimated, risk. These products release harsh fumes (volatile organic compounds or VOCs) that can irritate the lungs, exacerbate conditions like asthma or COPD, and cause dizziness or confusion, which can indirectly lead to falls. The most immediate danger, however, comes from improper use or mixing.
The Health in Aging Organization issues a stark and critical warning about this very issue. As their experts state, the danger is acute and potentially fatal. This is not a suggestion; it is a hard rule of chemical safety that is especially important in a senior’s home where cognitive errors can occur.
Never mix bleach, ammonia, or other cleaning liquids together when you are cleaning. When mixed, cleaning liquids can create deadly gases.
– Health in Aging Organization, Home Safety Tips for Older Adults
The safest strategy is to remove these harsh chemicals from the home entirely and switch to fume-free alternatives. Modern cleaning technology offers highly effective options that rely on physics rather than chemistry. A high-quality steam cleaner can sanitize floors and surfaces using only heated water. Similarly, premium microfiber cloths are designed to trap dust and bacteria with just water, eliminating the need for chemical sprays. If commercial products are used, they should be certified non-toxic and fragrance-free. And regardless of the product, adequate ventilation during and after cleaning is non-negotiable.
By adopting a fume-free cleaning regimen, you protect vulnerable lungs and create a healthier indoor environment, contributing to overall well-being and safety.
How to conduct a room-by-room safety sweep like a pro?
A professional home safety assessment is not a simple visual scan; it is an empathetic, methodical process designed to uncover hazards that are invisible from a standing-height perspective. The single most effective technique recommended by occupational therapists is the “Walker’s-Eye View” audit. This involves physically sitting in a wheelchair or using a walker to navigate the home. This empathetic approach immediately reveals obstacles: the corner of a table that juts out, a lamp cord that’s easy to catch, or a threshold that’s difficult to cross. It forces you to experience the environment as the senior does.
During this sweep, a pro doesn’t just look for problems; they ask targeted questions to understand the senior’s lived experience. Instead of asking “Is your home safe?”, they ask “What is the most annoying part of your daily routine that makes movement difficult?” This pinpoints specific friction points. Another key question is, “What task makes you feel the most unsteady?” This reveals high-risk activities—like reaching for a dish in a high cabinet or bending to plug in a lamp—that need immediate modification. Finally, asking “Where in your home do you avoid going because it feels unsafe?” identifies ‘no-go zones’ that are restricting the senior’s independence and require urgent attention.
The sweep should systematically cover the “red zones”—the high-traffic, high-risk paths between the bed, the bathroom, and the kitchen. In each zone, a professional checks for the “Ergonomic Reach Zone”: are everyday items stored between waist and shoulder height to eliminate bending and stretching? They test the stability of every handrail and grab bar, and verify that lighting is adequate not just in the center of the room, but in every corner and closet. It is this combination of physical simulation and targeted inquiry that elevates a simple walkthrough to a professional-grade safety sweep.
By thinking and seeing like an occupational therapist, you can uncover and neutralize hidden hazards with a level of precision that a simple checklist can never provide.
Key takeaways
- The “Walker’s-Eye View” audit—physically simulating movement with a mobility aid—is the most effective way to identify hidden hazards.
- Focus on creating “predictable pathways” with furniture and lighting, as this reduces the mental effort (cognitive load) required for safe navigation.
- Eliminate or securely tape down all throw rugs and ensure high visual contrast between floors, furniture, and walls to support aging eyes.
How to Audit a Senior’s Living Space for Hidden Fall Hazards in Under an Hour?
Now that we’ve covered the core principles of senior home safety, it’s time to consolidate them into a single, high-impact action: a one-hour home audit. You don’t need to inspect every square inch of the house. The key to an efficient audit is applying the 80/20 rule. Focus on the 20% of the home where 80% of movement—and risk—occurs. These are the critical pathways: from the bed to the bathroom, and from the primary seating area to the kitchen. This targeted approach makes the task manageable and highly effective, especially when you remember that 60% of falls occur within the familiar confines of one’s home.
The audit itself should be a “stress test” based on three critical scenarios. As you walk the critical pathways, ask: 1) What happens if the power goes out right now? Is there backup, non-electric lighting like motion-activated battery LEDs? 2) If I were to fall here, could I reach a phone or call for help? 3) If I suddenly felt dizzy, is there a stable object to grab onto within arm’s reach? This mindset shifts the audit from passive observation to active risk simulation. During this hour, your mission is to verify the core safety pillars we’ve discussed: pathways are at least 36 inches wide, all rug edges are secured, lighting is bright and even, and daily items are within the ergonomic reach zone (waist to shoulder height).
To truly secure your home, the next logical step is to perform this one-hour audit. Use these professional insights to systematically transform your living space from a source of anxiety into a haven of safety and independence.