
Losing strength after 70 can be alarming, often making you fear that any exercise might lead to injury. This guide shifts the focus from vague advice like “stay active” to a precise, safety-first strategy. You will learn to interpret your body’s signals, choose the right exercises for conditions like arthritis or high blood pressure, and understand the science of muscle repair. The goal is to empower you to become a knowledgeable manager of your own physical health, safely rebuilding strength for lasting independence.
As we cross the threshold of 70, many of us notice a subtle but undeniable shift. A once-easy jar becomes a struggle, standing up from a low chair requires a push, and a general sense of frailty can begin to creep in. This isn’t just “getting older”; it’s often the first tangible sign of age-related muscle loss, a condition called sarcopenia. The common advice is to “eat more protein” and “do some strength training,” but this guidance often ignores the very real concerns of an active senior: How do I build strength without aggravating my arthritis? How do I know if I’m pushing too hard or heading for an injury? What if I have high blood pressure?
The fear of getting hurt is valid, and it can lead to a cycle of inactivity that only accelerates muscle decline. But what if the key wasn’t simply to exercise more, but to exercise with more precision? What if you could learn to read your body’s signals with the clarity of a diagnostic tool, distinguishing productive fatigue from a warning sign of injury? This guide is built on that premise. We will move beyond generic recommendations and into a physiotherapist’s approach to strength maintenance for the 70+ body. We’re not just talking about lifting weights; we’re talking about a holistic system for safely stimulating muscle growth.
This article will provide you with a clear framework to understand why this muscle loss happens, how to perform resistance training safely even with joint pain, and how to differentiate between good effort and harmful strain. We will explore specific exercise types for common health conditions and detail the crucial timing of nutrition to make every bit of effort count. This is your roadmap to not just slowing muscle loss, but actively and safely reversing it to protect your mobility and independence for years to come.
text
The following sections break down this strategic approach, providing you with the knowledge and tools to confidently manage your muscle health. Our table of contents outlines the key areas we will cover on your journey to renewed strength.
Summary: A Physiotherapist’s Strategy for Muscle Health After 70
- Why muscle loss accelerates after 70 and how to spot the first signs?
- How to perform resistance training without straining arthritic joints?
- The fatigue vs injury distinction: knowing when to stop exercising
- Isometric vs Isotonic exercises: which is safer for high blood pressure?
- When to consume protein after a walk to maximize muscle retention?
- Gym fees vs Hospital bills: the ROI of muscle mass maintenance
- Which 3 muscles must be strong to get off the toilet without using hands?
- Why the “Floor-to-Stand” Transfer Is the Single Most Critical Skill for Independent Living?
Why muscle loss accelerates after 70 and how to spot the first signs?
After age 70, the gradual decline in muscle mass, a process known as sarcopenia, can quicken its pace. This isn’t a personal failing; it’s a physiological reality driven by hormonal changes, a decrease in the nerve cells that signal muscles to contract, and a reduced ability to turn protein into muscle. It’s a widespread issue, with a 2023 comprehensive review showing that 10-16% of elderly individuals worldwide are affected by sarcopenia. The danger lies in its subtlety. It doesn’t happen overnight but manifests as a slow erosion of your functional capacity, making everyday tasks progressively harder and increasing your risk of falls.
The key is to develop what I call “physiological literacy”—the ability to recognize the earliest, softest signals your body sends. Waiting until you can no longer perform a task is waiting too long. Instead, you can perform simple self-checks to gauge your current strength levels. These aren’t strenuous tests, but mindful observations of daily activities. Paying attention to these subtle shifts is the first step in taking control and intervening before significant function is lost. It’s about catching the problem when it’s small.
Here are five simple, real-world indicators that can signal a decline in muscle strength:
- The Jar Test: Difficulty opening a new, tightly sealed jar is a direct indicator of declining grip strength, one of the first and most reliable markers of overall muscle loss.
- The Chair Challenge: Take note if you consistently need to use your arms to push off from a dining chair or a deep sofa. This suggests your leg and core muscles are no longer strong enough to do the job alone.
- The Stair Signal: An increased reliance on the handrail, not just for balance but for pulling yourself up, points to weakening quadriceps and glutes.
- The Grocery Gauge: If carrying a familiar bag of groceries from the car to the kitchen suddenly feels significantly heavier or more strenuous than it used to, your overall strength is likely diminishing.
- The Balance Check: Feeling less steady or needing to rush when standing on one foot to put on your shoes or pants can indicate a loss of stabilizing muscles in your core and legs.
How to perform resistance training without straining arthritic joints?
One of the most common and valid concerns I hear from clients is, “How can I do strength training when my joints already ache?” It’s a classic catch-22: you need to exercise to strengthen the muscles that support your joints, but the exercise itself can cause pain. The answer isn’t to avoid resistance training, but to change its form. The goal is to load the muscle, not the joint. This means shifting away from high-impact, heavy-load exercises and embracing low-impact, controlled movements.
Resistance bands are a senior’s best friend in this scenario. Unlike free weights, which exert a constant gravitational force and can be jarring, bands provide variable, progressive resistance. The tension increases as you stretch the band, allowing you to work the muscle through its full range of motion with minimal stress on the cartilage and connective tissues. The movement should always be slow and deliberate. Speed is your enemy; control is your goal. This ensures the targeted muscle is doing the work, not momentum or other compensating muscles.
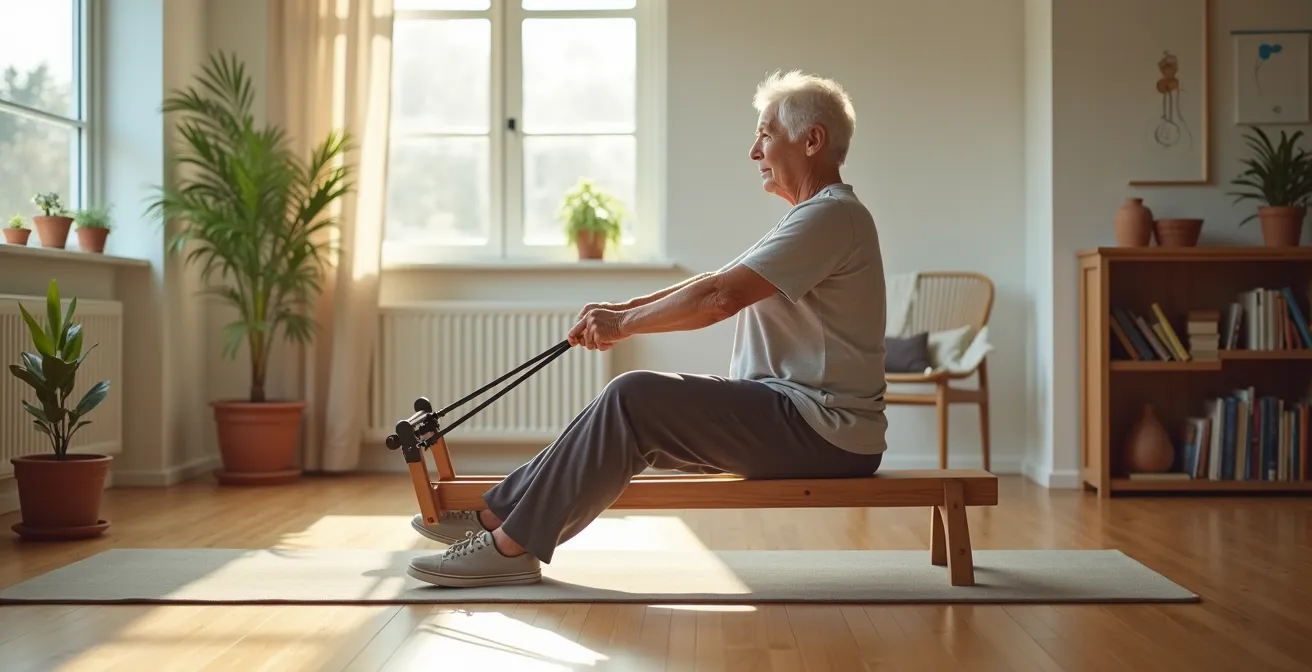
As you see in the image above, exercises can be performed while seated, which further protects the joints of the lower body, like the hips and knees, from bearing weight. This allows you to isolate and strengthen key muscle groups in the back, shoulders, and arms without provoking joint pain. The focus is on smooth, fluid motions that strengthen the muscle tissue surrounding the joint, which in turn provides better stability and can actually reduce arthritic pain over time. Remember, strong muscles act as shock absorbers for your joints.
The fatigue vs injury distinction: knowing when to stop exercising
The vague advice to “listen to your body” is perhaps the most unhelpful platitude given to seniors. When you’re actively trying to rebuild muscle, some discomfort is not only normal but necessary. This is the productive “burn” of a muscle working hard. However, other types of pain are warning signals that you are crossing the line from productive stress to potential tissue damage. Learning to differentiate between these sensations is the single most important safety skill in any exercise program. Without this knowledge, you either stop too soon and make no progress, or you push too far and get injured.
To provide clarity, I teach my clients a simple “Traffic Light System” for pain recognition. It’s a risk mitigation framework that categorizes sensations to guide your actions in real time. Green light sensations are signs of healthy muscle work. Yellow light sensations are cautions that require you to adjust what you’re doing. Red light sensations are an absolute stop sign, signaling a high risk of injury. This system replaces guesswork with a clear decision-making process, empowering you to exercise with confidence.
This table breaks down the Traffic Light System, helping you decode your body’s signals during exercise. As recent fitness research highlights, understanding these cues is essential for safe and effective training.
| Signal Color | Type of Sensation | What It Means | Action to Take |
|---|---|---|---|
| GREEN | Muscle burn during exercise, general fatigue | Normal muscle work, healthy adaptation signal | Continue exercising, this is productive |
| YELLOW | Dull ache during specific movement | Potential strain or overuse beginning | Modify exercise or reduce weight |
| RED | Sharp, stabbing, or radiating pain | Risk of injury or existing damage | Stop immediately and consult healthcare provider |
By internalizing this framework, you transform from a passive recipient of vague advice into an active, informed manager of your own workout intensity. You learn that the warm burn in your thighs during a squat is a ‘green light’ to continue, but a sharp twinge in your knee is a ‘red light’ that means you must stop that exercise immediately. This is the essence of training smart.
Isometric vs Isotonic exercises: which is safer for high blood pressure?
For individuals managing high blood pressure, the type of resistance exercise performed is critically important. Traditional (isotonic) exercises involve muscle contraction with movement, like lifting a dumbbell or stretching a resistance band. These are excellent for building muscle but can cause temporary spikes in blood pressure. An alternative and often safer starting point is isometric exercise. This involves contracting a muscle without any visible movement of the joint. Think of pushing against a wall or holding a “wall sit” position.
The primary safety advantage of isometrics is that they can be performed at a lower intensity while still stimulating the muscle effectively. The key to doing them safely with hypertension is two-fold: moderate effort and continuous breathing. You should never strain to the point where you need to hold your breath (this is called the Valsalva maneuver, and it dangerously spikes blood pressure). Instead, aim for a 50-60% effort level, holding the contraction for short durations (15-30 seconds) while breathing steadily and deeply throughout.
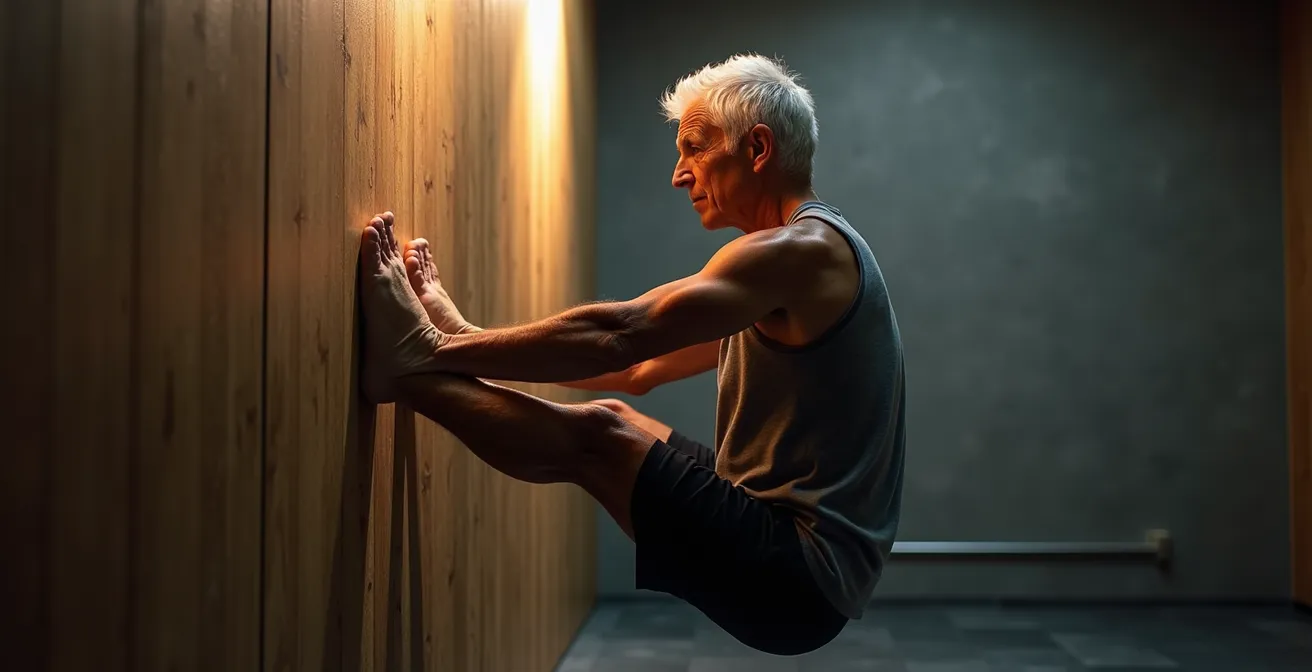
The wall sit, as shown here, is a perfect example. It strengthens the large muscles of the legs and glutes without any joint movement, making it ideal for those with knee arthritis as well. By focusing on controlled breathing and maintaining a posture that doesn’t feel like a maximal strain, you can build foundational strength and stability. In fact, studies have shown that a consistent isometric exercise regimen can even contribute to a modest reduction in resting blood pressure over time, making it a powerful therapeutic tool when performed correctly.
When to consume protein after a walk to maximize muscle retention?
Many people believe that any form of activity, like a brisk walk, followed by a protein shake is the key to building muscle. This is a common and costly misconception. While walking is fantastic for cardiovascular health, it doesn’t create the specific stimulus needed for significant muscle growth. To build or maintain muscle, you need to create microscopic tears in the muscle fibers through resistance training. It is the repair of these micro-tears that makes the muscle stronger and bigger. Protein is the raw material for this repair process.
This leads to the crucial concept of the “anabolic window” or, more simply, optimal timing. Your body is most receptive to using protein for muscle repair in the period immediately following a resistance workout. Consuming protein after just a walk is not useless—it will be used for general bodily functions—but it will not be preferentially shuttled to your muscles for growth because the “build” signal from resistance exercise is missing. To truly maximize muscle retention, you must pair the right stimulus (resistance) with the right nutrient (protein) at the right time.
The goal is to consume a high-quality protein source within about 60 to 90 minutes after your strength workout. This doesn’t have to be a fancy supplement; it can be a glass of milk, a serving of Greek yogurt, a piece of chicken, or a scoop of whey protein in water. The specificity of this process is highlighted by modern research.
Case Study: The Power of Timed Protein and Leucine
A landmark 2023 study on adults over 65 demonstrated this principle perfectly. Participants who combined resistance training with a post-exercise supplement of whey protein (21g) and the amino acid leucine (3g) saw significant increases in their whole-body lean mass. The critical finding was that these gains were tied to consuming the protein within an hour after the resistance exercises, not just after general activity. This shows that the combination of the right stimulus and timed nutrition is what unlocks muscle growth potential, even at an advanced age.
Gym fees vs Hospital bills: the ROI of muscle mass maintenance
It’s easy to see a gym membership, a set of resistance bands, or a few sessions with a physiotherapist as an expense. I encourage you to reframe this completely: it is one of the highest-return investments you can make in your future quality of life. The relatively small, consistent cost of maintaining your muscle mass is an insurance policy against the catastrophic physical, emotional, and financial costs of a fall or a loss of independence. The numbers are stark; research citing CDC data shows that 1 in 4 adults aged 65 and over experiences a fall each year, and these events are often the trigger for a cascade of health crises.
A single fall-related hip fracture can lead to hospitalization, surgery, lengthy and painful rehabilitation, and, in many cases, a permanent move to an assisted living facility. The cost of this single event can run into tens or even hundreds of thousands of dollars, completely eclipsing a lifetime of gym fees. But the financial cost is only part of the story. The loss of confidence, the fear of falling again, and the erosion of your personal freedom are incalculable. Strength is your buffer against this outcome. Strong leg muscles can prevent a stumble from becoming a fall, and strong arm and core muscles can help you get back up if you do fall.
Investing in your strength is a direct investment in your autonomy. It means being able to live in your own home for longer, manage your own daily activities, and avoid the immense costs of long-term care. It is the very definition of proactive healthcare. To put this into perspective, consider a simple audit of your personal health investment.
Your Personal Health Investment Audit: A Quick Checklist
- Investment Cost: Tally your monthly costs for strength maintenance (e.g., gym, bands, classes). Is it $20, $50, $100?
- Potential ER Bill: Compare this to the average cost of a single fall-related emergency room visit in your area (often thousands of dollars).
- Independence Value: Factor in the avoided costs of home modifications (grab bars, stair lifts) or, more significantly, assisted living facilities.
- Medication Savings: Consider potential reductions in medication costs as health markers like blood pressure or blood sugar improve with exercise.
- Caregiver Costs: Acknowledge the significant savings from reducing or eliminating the need for paid home care services.
Which 3 muscles must be strong to get off the toilet without using hands?
The ability to stand up from a seated position, particularly a low one like a toilet, without using your hands is a cornerstone of functional independence. It’s a movement we take for granted until it becomes difficult. When you have to push off with your hands, it’s a clear sign that three key muscle groups are no longer doing their job effectively: the quadriceps (front of your thighs), the gluteus maximus (your main buttock muscle), and the erector spinae (the muscles running along your spine that keep you upright).
The quadriceps are responsible for straightening your knee, providing the primary “lift.” The glutes are powerful hip extensors, helping to drive your body upward and forward. The erector spinae and other core muscles act as stabilizers, keeping your torso rigid and preventing you from falling forward or backward during the movement. When these three work in concert, standing is effortless. When one or more are weak, the body is forced to compensate by using the arms for an extra push.
The good news is that these muscles can be specifically and safely strengthened. The single most effective exercise is the simple “sit-to-stand,” performed with control. You can progress from using hand assistance to no hands, and then to slowing down the “sitting” phase to build even more strength. This directly mimics the functional movement you need every day. This can be supplemented with glute bridges and core exercises to create a complete support system. The belief that significant strength gain is impossible at an advanced age is a myth.
In a study where 10 participants aged 90 performed resistance training for 8 weeks, they increased their thigh muscle area by 9% on average – effectively reversing almost a decade of muscle loss. One participant reported: ‘After just two months, I could stand from my chair without pushing off with my hands for the first time in years.’
– Participant report, LiveStrong
Key Takeaways
- Muscle loss (sarcopenia) accelerates after 70, but can be spotted early by monitoring daily tasks like opening jars or rising from chairs.
- Safe resistance training with joint pain is possible using low-impact tools like resistance bands and focusing on controlled movements.
- Use the “Traffic Light System” (Green/Yellow/Red) to distinguish between productive muscle fatigue and harmful pain to prevent injury.
Why the “Floor-to-Stand” Transfer Is the Single Most Critical Skill for Independent Living?
While getting off a toilet is a daily necessity, the ability to get up from the floor on your own is the ultimate safety net. A fall can happen to anyone, at any age. For a younger person, it’s often a minor event. For a senior, the fall itself might not cause injury, but the inability to get back up can turn a non-event into a life-threatening crisis. This is known as a “long lie,” and it can lead to dehydration, pressure sores, hypothermia, and pneumonia. The physical strength and coordination to perform a floor-to-stand transfer is therefore not just a skill; it is arguably the single most critical determinant of your ability to live alone safely.
This transfer is a complex movement that requires a symphony of physical attributes: lower body strength to lift your weight, upper body strength to push and stabilize, core stability to control your trunk, and flexibility to move through the required positions. It is the ultimate test of your body’s functional reserve. The reason falls are so devastating is clear in the data; CDC data shows that among individuals aged 65-84, falls account for 87% of all fractures. Possessing the skill to get up from the floor mitigates the worst consequences of these events.
Practicing this skill doesn’t have to be intimidating. It can be broken down into smaller, manageable steps, starting from a high kneeling position or using a sturdy piece of furniture for support. Activities like Tai Chi have been proven highly effective, not just in preventing falls, but in improving the very skills needed for recovery. A study of older adults who practiced Tai Chi found they had 52% fewer falls, specifically because their ability to recover from stumbles and perform floor-to-stand transfers improved. This skill is your ultimate insurance policy, empowering you with the confidence that even if a fall occurs, you have the capacity to recover on your own.
By adopting this mindset of a knowledgeable body manager, you move from a place of fear to a position of empowerment. You now have the tools to interpret signals, choose safe exercises, and fuel your body for repair. Your strength is not a finite resource that inevitably drains away; it is a savings account that you can actively and safely contribute to, ensuring you have the reserves you need to live a full, independent, and confident life. The next logical step is to put this knowledge into practice with a consistent, safe routine.
Frequently Asked Questions on Sustaining Physical Health After 70: How to Maintain Muscle Mass Safely?
Can I do isometric exercises if I have high blood pressure?
Yes, with proper technique. Short-duration (30 seconds), moderate-effort isometrics with continuous breathing can actually help lower blood pressure over time. Avoid holding your breath or straining.
How do I know if I’m doing isometrics safely?
If your face turns red or you need to hold your breath, you’re using too much effort. Maintain steady breathing and aim for 50-60% of maximum effort.
Should I choose isometric or isotonic exercises?
If your blood pressure is uncontrolled, start with isotonic exercises. Once managed with medication, you can safely add short isometric holds for joint stability.