The fear of falling is often rooted in the fear of not being able to get back up. The solution isn’t to stop moving; it’s to master the floor-to-stand transfer as a fundamental, buildable skill.
- This skill is not about brute strength but a “mobility toolkit” combining targeted muscle power, specific joint flexibility, and proper technique.
- Deconstructing the movement into smaller parts—like ankle mobility, hip flexibility, and leg strength—makes it achievable and safe to practice.
Recommendation: Begin by integrating these small, targeted movements into your daily routine to build the strength and confidence that lead to true independence.
The quiet, nagging fear of a fall can significantly limit one’s world. It’s not just the fall itself, but the deeply unsettling question that follows: “If I fall, will I be able to get back up?” This concern can lead to a cycle of reduced activity, which paradoxically increases the risk of falling by weakening muscles and diminishing balance. Many believe the answer lies in simply “being more careful” or strengthening legs in a general sense. While well-intentioned, this advice misses the core of the issue.
True confidence and independence don’t come from avoiding movement; they come from mastering it. The ability to get up from the floor without assistance is not an emergency reaction but a fundamental life skill, much like walking or climbing stairs. It is a measurable indicator of functional fitness and a powerful tool for maintaining autonomy. Instead of viewing it as a single, daunting task, we must deconstruct it into its essential components: mobility, strength, and technique.
But what if the key wasn’t just about raw power, but about smarter movement? What if the stiffness in your ankles was a bigger problem than the strength in your thighs? This guide will shift the perspective from fear to empowerment. We will break down the floor-to-stand transfer into a “mobility toolkit” of manageable skills. We’ll explore the specific muscles that need to be strong, the joints that must be flexible, and the safest, most efficient technique to put it all together. By building this skill proactively, you build a foundation for a more active, confident, and independent life.
This article provides a complete roadmap to developing this critical skill. We will start by understanding the physical changes that make this movement challenging, then move through a series of targeted exercises and techniques, and finally, discuss how to create a safe environment that supports your independence.
Summary: Mastering the Floor-to-Stand for Lifelong Independence
- Why Muscle Loss Accelerates After 70 and How to Spot the First Signs?
- Why Stiff Ankles Are the Silent Cause of Balance Issues on Stairs?
- The 90/90 Stretch: Unlocking Tight Hips to Improve Walking Stride
- Which 3 Muscles Must Be Strong to Get Off the Toilet Without Using Hands?
- Brushing Teeth on One Leg: Sneaking Balance Work into Hygiene Routines
- How to Get Up From the Floor Using the “Tripod Method” to Spare Your Knees?
- When to Install Grab Bars: Waiting for a Fall vs. Proactive Safety?
- Sustaining Physical Health After 70: How to Maintain Muscle Mass Safely?
Why Does Muscle Loss Accelerate After 70 and How Do You Spot the First Signs?
The gradual loss of muscle mass, a process known as sarcopenia, is a natural part of aging. However, this process can accelerate significantly after the age of 70, creating a noticeable impact on daily functional strength. It’s not just about a loss of raw power; it’s a decline in the muscle fibers responsible for quick, responsive movements. This change is the primary reason why simple tasks, like getting out of a chair or catching one’s balance, become more difficult. This weakness is directly linked to fall risk; The World Health Organization estimates that 646,000 individuals worldwide die each year from falls, making it a critical health concern.
Recognizing the early warning signs is the first step toward proactive management. These signs are often subtle and can be easily dismissed as just “slowing down.” However, they are important indicators that your body needs more targeted strength work. Paying attention to these changes allows you to intervene before they lead to a significant loss of independence or a dangerous fall. The key is to shift from a reactive mindset to a proactive one, addressing these signs as they appear.
Here are some of the most common early indicators of accelerated muscle loss:
- Difficulty standing from a seated position without pushing off with your hands.
- A noticeable decrease in your natural walking speed or feeling the need to rest more often.
- Struggling to lift everyday objects that used to be manageable, such as a gallon of milk or heavy grocery bags.
- A weaker grip, which you might notice when trying to open a jar or carry a suitcase.
- Finding that routine activities, like climbing a flight of stairs, take more time and effort than they used to.
Spotting these signs isn’t cause for alarm, but a call to action. It signals the perfect time to focus on specific functional exercises that directly combat sarcopenia and preserve the strength needed for a safe, active life.
Why Are Stiff Ankles the Silent Cause of Balance Issues on Stairs?
When we think about balance, our minds often jump to core strength or leg power. However, the foundation of our stability begins at the ground: our ankles. Stiff ankles, specifically a lack of ankle dorsiflexion (the ability to pull your toes up toward your shin), can be a silent and significant contributor to balance problems, especially on uneven surfaces like stairs. When you ascend or descend stairs, your front ankle must bend sufficiently to allow your center of gravity to move forward smoothly over your foot. If this movement is restricted, your body must compensate.
This compensation often involves lifting the heel up too early, shifting weight to the outside of the foot, or leaning the torso excessively forward. These are all inefficient and unstable movements that increase the energy cost of climbing and, more importantly, dramatically raise the risk of a misstep or fall. A stiff ankle prevents your shin from moving forward over your foot, effectively shortening the base of support you have on each step. This forces other parts of your body, like your hips and lower back, to work harder to maintain balance.
Improving ankle mobility is a crucial piece of the “mobility toolkit” for independent living. Simple, gentle stretches can restore this vital range of motion. For example, sitting in a chair and placing your foot flat on the floor, you can slowly lean forward, keeping your heel down, to feel a stretch in your calf and Achilles tendon. This small movement, practiced regularly, can have a profound impact on your stability. It ensures the first link in your kinetic chain is functioning correctly, setting the stage for better balance and more confident movement on any terrain.
By addressing ankle stiffness, you are not just improving a single joint; you are enhancing the safety and efficiency of your entire movement pattern, making every step you take, especially on stairs, more secure.
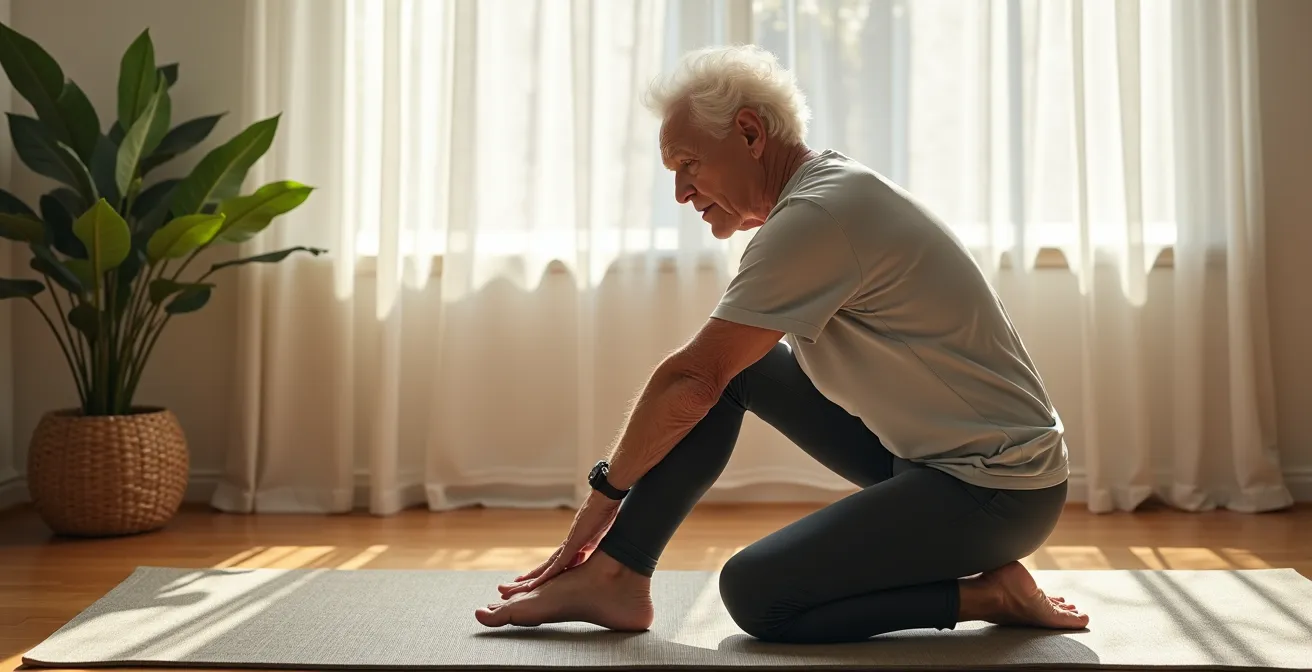
The 90/90 Stretch: Unlocking Tight Hips to Improve Walking Stride
Just as stiff ankles can disrupt your balance, tight hips can severely restrict your freedom of movement. The hip joint is designed for a wide range of motion, but a sedentary lifestyle can lead to stiffness, particularly in the hip rotators. This tightness directly affects your walking stride, your ability to bend down, and your capacity to get up from low surfaces, including the floor. When your hips are tight, your body is forced to find movement elsewhere, often by rounding the lower back, which puts you in a weak and unstable position.
The 90/90 stretch is a highly effective and safe way to improve both internal and external rotation of the hips. It is a cornerstone of building the “mobility toolkit” needed for functional independence. This stretch gently opens up the hip capsule, relieving tension and restoring the natural range of motion necessary for a fluid and efficient walking gait. A more mobile hip allows for a longer, more powerful stride, reducing the strain on your knees and back.
To perform this stretch, it’s best to start in a comfortable, open space. The visual below demonstrates the correct starting position for this beneficial movement.
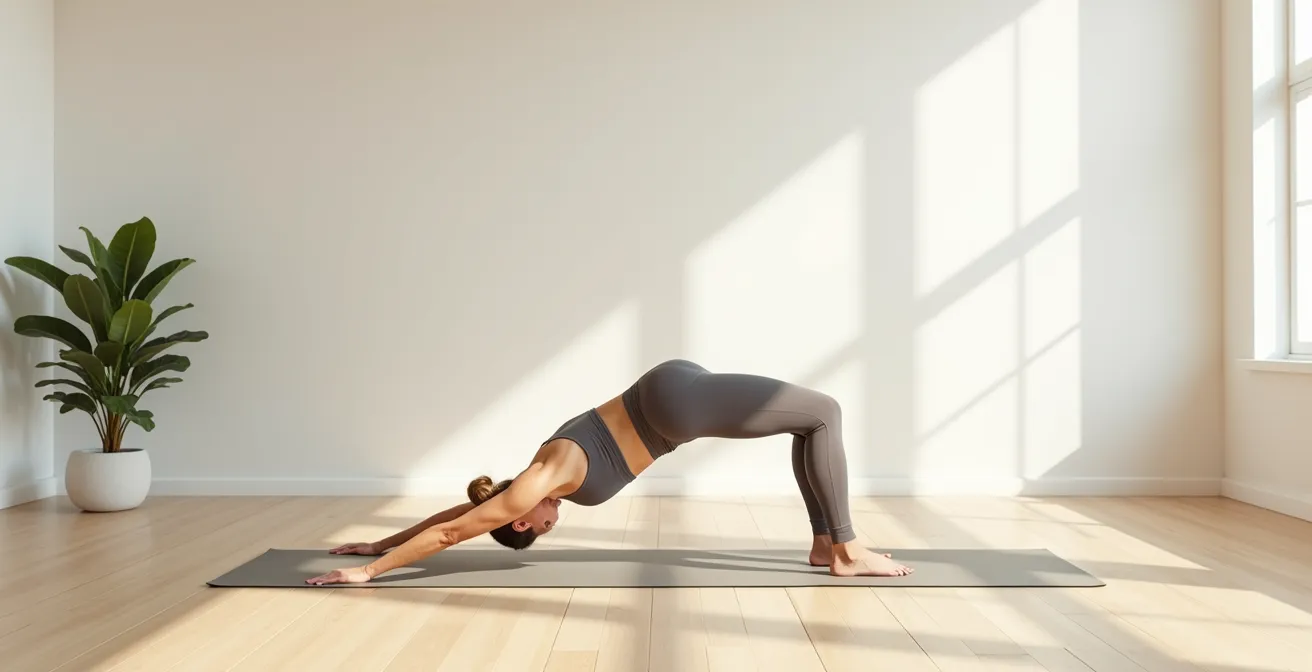
As shown, you begin by sitting on the floor. Position your front leg so the shin is parallel to your body, with the knee bent at 90 degrees. Position your back leg to the side, also with the knee bent at 90 degrees. Keeping your torso tall, you can gently rotate toward your front leg to deepen the stretch. The goal is not to force the movement but to relax into it, using your hands for support as needed. This position targets the deep muscles around the hip joint that are often the source of stiffness.
By regularly incorporating the 90/90 stretch into your routine, you are not just stretching; you are reclaiming the freedom of movement that is essential for everything from walking with ease to confidently getting up from the floor.
Which 3 Muscles Must Be Strong to Get Off the Toilet Without Using Hands?
The ability to stand up from a low surface like a toilet or a deep chair without using your hands is a powerful indicator of functional lower-body strength. This single movement, known as the sit-to-stand, is a foundational component of the floor-to-stand transfer. It relies on the coordinated power of three specific muscle groups. Strengthening them is not just about general fitness; it’s a targeted strategy for maintaining independence in the most essential daily activities. These muscles are the engine for lifting your body against gravity.
The sit-to-stand exercise is identified as arguably the best mobility exercise for seniors because it directly trains the exact muscles needed for this transfer in a functional way. No special equipment is needed, just a sturdy chair. The three primary muscles you are targeting are:
- Gluteus Maximus (The Glutes): This is the largest muscle in your body, located in your buttocks. Its primary job is hip extension—the powerful thrusting motion that straightens your hips and lifts your torso upright. Weak glutes are a primary reason people have to push off with their hands.
- Quadriceps (The Quads): This group of four muscles on the front of your thigh is responsible for knee extension—straightening your leg. They provide the “lift-off” power to push your body away from the seat.
- Erector Spinae: These are the muscles that run along your spine. Their role is to keep your back straight and stable during the movement. A strong core and back prevent you from slumping forward and losing balance as you rise.
Practicing the sit-to-stand movement with a focus on good form—keeping your chest up, driving through your heels, and squeezing your glutes at the top—directly builds strength in this critical trio. This isn’t just an exercise; it’s a rehearsal for a key life skill.
By developing these three muscles, you are building the raw power needed not only to get off the toilet but also to execute the most challenging phases of getting up from the floor.
Brushing Teeth on One Leg: Sneaking Balance Work into Hygiene Routines
Improving balance doesn’t always require a dedicated gym session or a formal exercise class. Some of the most effective balance training can be “snuck” into your existing daily routines. This approach, known as habit stacking, involves attaching a new, small exercise to a habit you already perform without thinking. The morning and evening hygiene routine, particularly brushing your teeth, offers a perfect two-to-three-minute window for this practice. Standing on one leg while brushing your teeth is a simple yet profoundly effective way to enhance your proprioception and stability.
Proprioception is your body’s “sixth sense”—its ability to know where it is in space without you having to look. This sense relies on signals from nerves in your muscles and joints. As we age, this system can become less sharp. Training it is crucial for fall prevention. When you stand on one leg, you challenge this system, forcing the small stabilizing muscles in your standing foot and ankle to make constant, tiny adjustments to keep you upright. This is the very definition of functional balance training.
The key is to do it safely. Start by standing near a countertop or wall that you can touch for support. Lift one foot just an inch off the ground. Your goal is not to lift it high but to maintain a stable posture. Focus on keeping your hips level and your standing knee slightly bent, not locked.
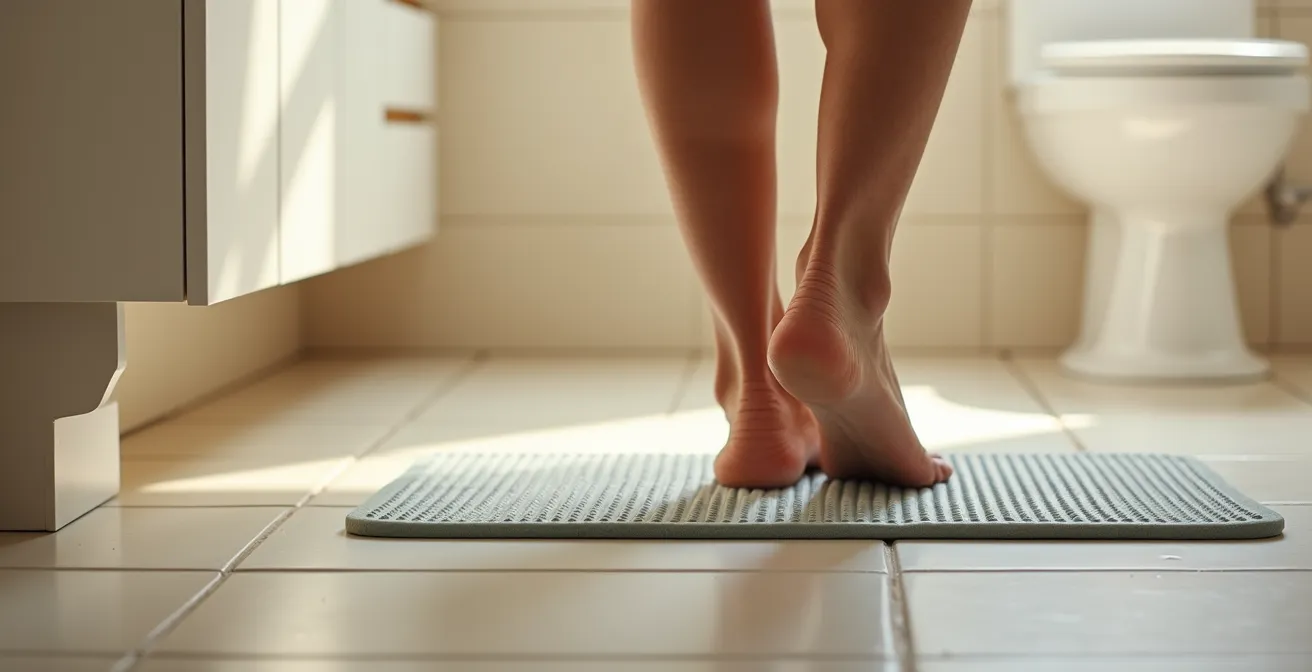
As the image highlights, the magic happens in the standing foot and ankle. The muscles are working hard to maintain your center of gravity over your base of support. As you get more comfortable, you can try to rely less on the counter, first with a fingertip touch, and eventually with no hands at all. Try switching legs halfway through your brushing routine to ensure you train both sides equally. It’s a small change that builds significant neuromuscular confidence over time.
By weaving balance work into an everyday activity, you make it consistent and automatic. This consistency is the secret to building the reflexive stability that protects you from falls.
How Do You Get Up From the Floor Using the “Tripod Method” to Spare Your Knees?
Knowing the theory is one thing; having a clear, safe, and repeatable technique is another. The “Tripod Method” is a gold-standard technique for getting up from the floor because it deconstructs the movement into logical, stable steps. It is designed to minimize strain on the knees and back by creating a wide and stable base of support at each stage. This is the core skill in your “mobility toolkit,” the one that directly answers the question, “How do I get back up?”
The name “tripod” comes from the stable, three-point base you create with your foot, your knee, and your hand before the final push to standing. This method avoids the common mistake of trying to push up with both hands from behind, which strains the shoulders and requires significant core strength. Instead, it uses leverage and a progressive transfer of weight. Mastering this sequence builds not only physical capability but also the neuromuscular confidence that you have a reliable plan in case of a fall.
Practicing this method on a soft surface, like a carpet or mat, when you are feeling fresh and calm is the best way to commit it to memory. Don’t wait for an emergency to try it for the first time.
Your Action Plan: Mastering the Tripod Floor Recovery
- Roll to Side-Lying: From lying on your back, bend your knees and roll onto your preferred side. Use your head to lead the movement and allow your body to follow. Pause here to ensure you are not dizzy.
- Push to Side-Sitting: Use your top arm to push against the floor, bringing your torso into an upright, side-sitting position. Keep your movements slow and controlled.
- Transition to All-Fours: Rotate your body toward the floor, placing both hands on the ground to move into a stable hands-and-knees (all-fours) position. This is a very secure base.
- Establish the Half-Kneel: Bring your stronger leg forward, placing your foot flat on the floor in front of you. You are now in a half-kneeling or “proposal” position.
- Create the Tripod: Place your hand on your forward thigh (not the kneecap). Your front foot, back knee, and this hand now form a stable tripod. Keep your back straight and shift your weight forward.
From this strong tripod base, you can take a deep breath and push through your front foot to rise to a standing position. By breaking the movement down, you make a seemingly impossible task manageable and safe.
When Should You Install Grab Bars: Waiting for a Fall vs. Proactive Safety?
The conversation around home modifications like grab bars often begins too late—after a fall has already occurred. This reactive approach overlooks a critical fact: the first fall is a major predictor of future falls. As the Centers for Disease Control and Prevention states, this event is a significant warning sign. In fact, CDC data shows that more than 1 in 4 people aged 65 and older fall each year.
This is why adopting a mindset of proactive safety is so important. Installing grab bars is not an admission of weakness; it is a smart and powerful strategy to maintain independence and prevent the first fall from happening. According to the Centers for Disease Control and Prevention in their Fall Prevention Guidelines:
falling once doubles the chances of falling again
– Centers for Disease Control and Prevention, CDC Fall Prevention Guidelines
This statistic transforms grab bars from a recovery tool into an essential prevention tool. Waiting for a fall to install them is like buying a fire extinguisher after the fire has started. The time to install them is when you first notice even slight changes in your balance, strength, or confidence with movement, especially in high-risk areas.
Case Study: Strategic Grab Bar Placement Beyond the Bathroom
While grab bars are most commonly associated with bathrooms—in showers, by the tub, and next to the toilet—a proactive safety strategy considers all “transition zones” in the home. Strategic placement should also include the hallway between the bedroom and bathroom for late-night trips, at the top and bottom of staircases, and next to a favorite armchair where one spends a lot of time. Installing a grab bar in these locations provides a stable anchor point for the small movements that can often lead to a loss of balance, creating a comprehensive safety net throughout the home.
By installing grab bars proactively, you are taking control of your environment and creating a space that supports your goal of living safely and independently for as long as possible.
Key Takeaways
- The ability to get up from the floor is a buildable skill, not an all-or-nothing ability, composed of specific strength, mobility, and technique.
- Functional independence is built by targeting key components: ankle mobility for stability, hip flexibility for stride, and specific muscles (glutes, quads, erector spinae) for power.
- Proactive safety, through both skill-building and home modifications like grab bars, is far more effective than reacting after a fall has already occurred.
How Can You Sustain Physical Health After 70 by Maintaining Muscle Mass Safely?
Maintaining physical health and independence after 70 is an active, ongoing process. The skills and strengths we’ve discussed are not a one-time fix but require consistent, gentle maintenance. The ultimate goal is to sustain muscle mass and functional mobility to ensure that you not only know how to get up from the floor but that you always have the physical capacity to do so. The reality is that without this capacity, the knowledge is not enough. This is a stark truth highlighted by sobering statistics.
The decline in muscle mass can have severe consequences during an actual fall event. It is not guaranteed that an older adult will be able to get themselves up, even if they know the proper technique. Indeed, research shows that nearly 50% of people over the age of 70 who fall are unable to get up on their own. Lying on the floor for an extended period, even if uninjured, can lead to serious complications like dehydration, pressure sores, and hypothermia. This is why preserving the strength to perform the floor-to-stand transfer is the single most critical skill for maintaining true independence.
Sustaining this ability involves a simple, two-pronged approach. First, continue to integrate small “movement snacks” into your day: practice single-leg balance while waiting for the kettle to boil, do a few sit-to-stands from a sturdy chair during a commercial break, and perform gentle hip and ankle stretches in the evening. Second, engage in regular, safe resistance training. This doesn’t mean lifting heavy weights; it can be as simple as using resistance bands, doing bodyweight exercises, or joining a senior-focused fitness class. The key is consistency to send a regular signal to your muscles that they are needed.
By embracing this maintenance mindset, you are not just preventing falls. You are actively investing in your freedom, your confidence, and your ability to live a full and engaged life on your own terms, secure in the knowledge that you have the skills and strength to handle life’s ups and downs.